Graphics Reference
In-Depth Information
just have to live with a zombie sleep-
walking character “staring” you in the
face.
On a real face, the eyelids rest on the
eyeball itself, suspended by a thin layer
of fluid. We're not going to do that here,
but we do need to make sure that the
eyelid mesh meets the eye sphere. You
could use a Shrink Wrap modifier that
affects only a vertex group that contains
the inner edge of the eyelid, but there is
an easier way. Select the inner edge of
each of the eyelids and extrude them
backwards along the
y
axis, into the
head. You only have to go a part of the
way into the eye, actually, but the result
when seen with a Subsurf modifier is that
the inner surface of the eyelid seems to
meet the eye.
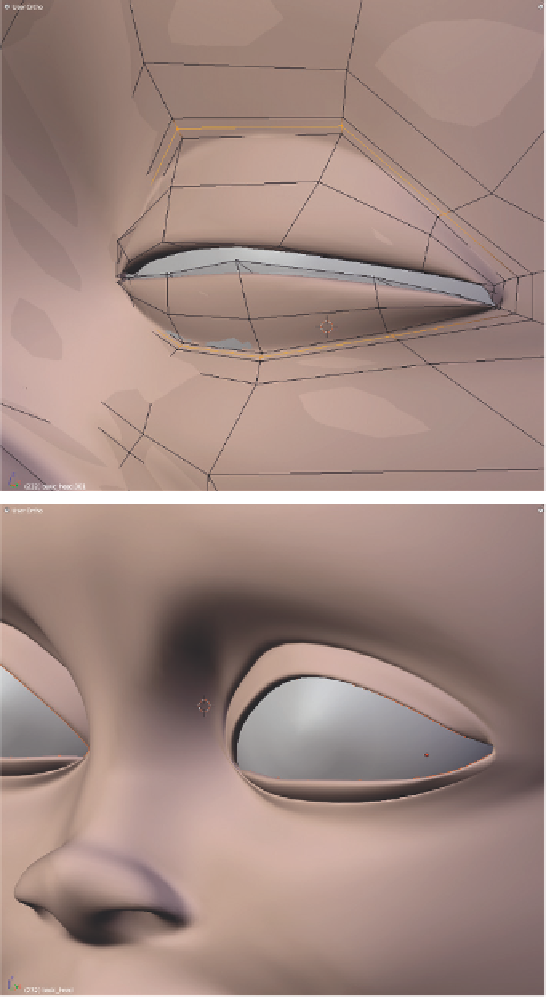
Before moving on, let's add a little crease
around the eyes themselves, just to give
them some more definition. Once again,
the Loop Cut tool is your best friend.
Add a new loop around the eye and edge
slide it inward. Add a second loop outside
of it and slide it inward too. Use
Alt-RMB to select that first loop, which
is now sandwiched between two nearby
loops (
Figure 6.13
). Deselect the couple
of vertices nearest the corners of the
eyes. Then, use Alt-S to shrink the
remaining selected vertices a very short
way into the head. This creates a crease
along the top and bottom of the eyelids.
Figure 6.13
Adding a crease to the eyelids.
Asymmetry
As was mentioned earlier, the base head model is provided with a Mirror modifier to make initial work
easier. Not all of your character designs will be symmetrical, and, if you're using reference photos, you may
have just learned how asymmetrical your subject's face really is. During the initial phase, it makes sense to
Search WWH ::

Custom Search