Graphics Reference
In-Depth Information
That is, if you drag the Knife tool across
an edge once, then switch back and cross
it again, only the first crossing is used for
the cut. This is great if you need to cut a
specific shape or line into a mesh. For our
purposes, it's kind of useless. We want a
nice, round cut through the edges without
having to painstakingly draw it. Undo that
test cut. Holding down the K key, drag
the knife in a circle around the tabletop.
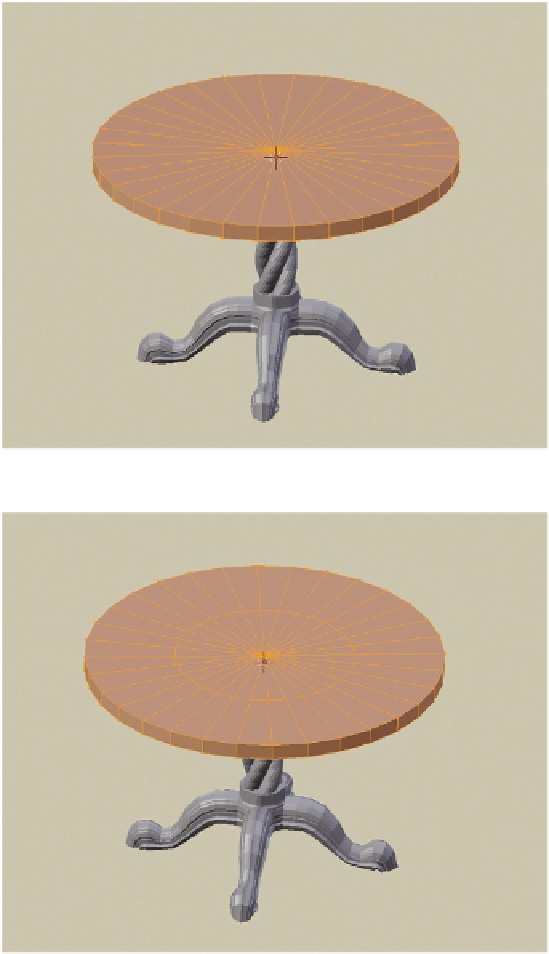
Knife has another mode called Midpoint.
Simply change the Type setting in the
Tweak Panel to Midpoint, and the cut
now resembles the one in
Figure 4.41
.
Regardless of where the edge is actually
crossed with the knife, the cut is made on
the edge's midpoint. In this case, the knife
tool is just a general indicator of which
edges you would like to have cut, not
where you would like them to be cut.
Figure 4.40
A tabletop object, added and scaled.
Between this new ring of edges and the
outer edge of the cylinder use the Loop
Cut tool (Ctrl-R) to add another circle.
This time it works, as we're adding a loop
to a true ring of faces. It was the central,
shared point of the pie formation that was
messing things up. Use Edge Slide (Ctrl-
E) to move this fairly close to the first cut.
In Face select mode, use Alt-RMB to
select the thin ring of faces you've just
created. Use the E key to extrude them
downward (constrain with the Z key),
making a little indentation in the table.
If you like you can make two more loop
cuts near the edge of the table and use
the same procedure to add a little more visual interest to the model. You can see that this is what was
done to the example file back in
Figure 4.30
.
Figure 4.41
A circle cut into the tabletop.
Finally, go to the Properties window and add a new modifier: Bevel. Bevel places a nice, well-beveled
edge on your models. Beveling is very useful when it comes time to render objects. Almost nothing in
Search WWH ::

Custom Search