Information Technology Reference
In-Depth Information
5. Click the
Select or type a Distinguished Name or Naming Context
option button, and type
cn=app1,dc=w2k8adXX,dc=com
in the text box below it.
6. Click the
Select or type a domain or server
option button, type
server1XX
in the text box
below it, and then click
OK
.
7. In ADSI Edit, click to expand the
App1
node. Right-click the
Cn=app1,dc=w2k8adXX,dc=com
folder, point to
New
, and click
Object
.
8. In the Select a class list box, click
group
, and then click
Next
. In the Value text box, type
App1-Group
, and then click
Next
.
9. Click the
More Attributes
button to open the Attributes dialog box, where you can edit addi-
tional attributes of the group object. The adminDescription attribute is selected by default
in the Select a property to view list box. In the Edit Attribute text box, type
Group for App1
Users
, and then click
Set
. Click
OK
and then
Finish
.
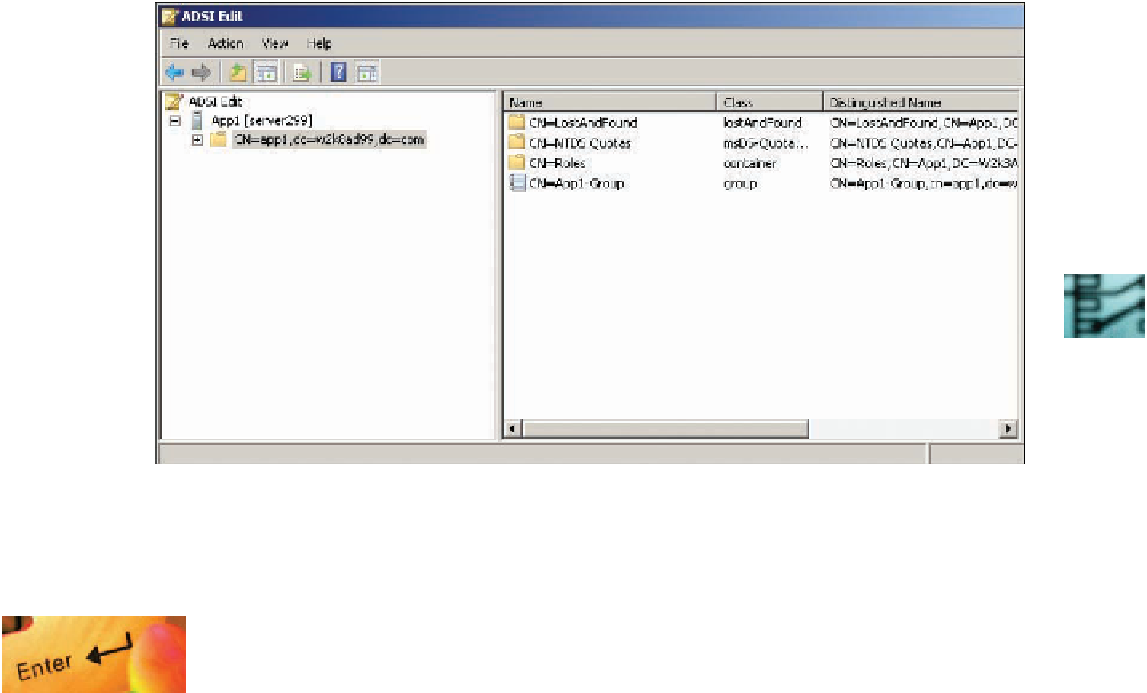
10. In ADSI Edit, click the
CN=app1,dc=w2k8adXX,dc=com
folder. The new object you created
is shown in the middle pane (see Figure 12-3).
12
Figure 12-3
ADSI Edit with a new group object
11. To create a user, you must modify the schema of the AD LDS instance, which you do in the
next activity. For now, close ADSI Edit but stay logged on to Server1XX.
Activity 12-3: Extending the AD LDS Schema
Time Required:
20 minutes
Objective:
Use LDIFDE to import a user class to the schema of an AD LDS instance.
Description:
You want to create users for your AD LDS instance, but first you must extend the
schema by importing the ms-user.ldf file in C:\Windows\Adam with LDIFDE.
1. Log on to
Server1XX
as Administrator, if necessary.
2. Open a command prompt window, type
ldifde -i -f c:\windows\adam\ms-user.ldf -s server1XX
-k -c “CN=Schema,CN=Configuration,dc=X” “#schemaNamingContext”
, and press
Enter
.
(The X after dc= in the command is an actual X and should not be replaced by a value.)
3. Open ADSI Edit. Right-click the
CN=app1,dc=w2k8adXX,dc=com
folder, point to
New
,
and click
Object
. In the Select a class list box, click
user
, and then click
Next
. (If you get an
error, make sure you close ADSI Edit, restart it, and then try again.)


Search WWH ::

Custom Search