Game Development Reference
In-Depth Information
15.
The first thing to do is to scale down the dimensions of the animation to something
compatible with the game. Go to
Image, Image Size
and set the image dimensions to
210x210 pixels. Select
Convert
when you are asked if you want to convert the video
layer into a smart object layer.
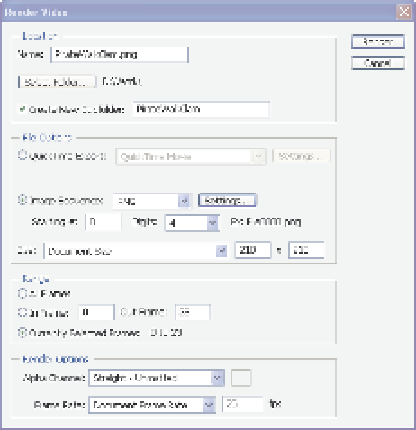
16.
Now go to
File, Export, Render Video
and the dialog shown in Figure 10-27 should
appear. Make sure that your settings are the same as these before clicking
Render
.
Figure 10-27.
The render settings for exporting the animation as a png sequence from Photoshop
17.
After a short period, you will have a new directory filled with sequentially numbered
.png
files corresponding to each frame in the animation (there should be 24,
numbered 0-23). These are now ready to import directly into Game Maker as new
animated sprites.
So that's it. You can now let your imagination run riot, creating bizarre combinations of
pirates using all the limbs, heads, and weapons provided on the CD. If you get into Anime Studio
a bit more, you can soon begin to create your own animations, too. We look forward to seeing
what you come up with.
Conclusion: Save Progress and Continue!
Rick Wakeman said: “Success is found buried in the garden of failure. You have to dig a lot before
you find it!” The
Shadows on Deck
art process threw up some interesting problems, but through
generous portions of trial and error, and a lot of sustained effort, we managed to find some
interesting ways to address them.
In doing so, the team witnessed
Shadows on Deck
evolve from a story into a living, breathing
entity, perhaps the likes of which even they hadn't quite envisioned, but this is the role of the
artist, after all! The art process doesn't quite end here, though; as the programmer implements
the art into the game, there are bound to be one or two further issues that arise, but creating
something isn't as much fun if it's too easy!
Search WWH ::

Custom Search