Graphics Programs Reference
In-Depth Information
Creating
underwater
environment
materials
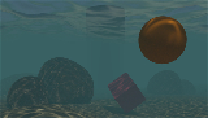
In this recipe, we will create an underwater environment, looking especially at a fake
caustic effect projected by the water's wavy surface and at the deep "atmospheric"
perspective, obtained by a per material dedicated node group, as shown here:
Getting ready
Let's start by preparing the scene:
1. Start Blender and switch to the Cycles rendering engine. Select the cube
and go in edit mode, scale it 21 times bigger (press
A
to select all the geo-
metry and then press
S
, digit
21
, and hit
Enter
), then scale it on the Z axis
to
0.300
(press
S
, followed by
Z
, digit
.3
, and hit
Enter
).
2. Go out of edit mode, switch to the
Objects Modifiers
window, and assign
a
Subdivision Surface
modifier. Set the type of subdivision to
Simple
and
the
Subdivision
value for both the
View
and the
Render
levels to
4
.
3. Add a second
Subdivision Surface
modifier and set the type of subdi-
vision to
Simple
and the
Subdivision
value for both the
View
and the
Render
levels to
2
.
4. Now assign an
Ocean
modifier. Set
Geometry
to
Displace
,
Spatial Size
to
20
, and
Resolution
to
12
.
5. Go in the
Object Data
window and click on the
+
icon under
UV Maps
to
add a set of
UV
coordinates. There is no need to unwrap the cube.
6. Press
N
and in the
Transform
panel set these values for the cube:
Loca-
tion
to
X 3.22600
,
Y 2.79600
,
Z -0.20400
.
7. Be sure to be at frame
1
and place the mouse in the modifier's
Time
slot,
press
I
to add a key for the animation. Go at frame
25
, change the
Time
value from
1.00
to
2.00
and press
I
again to set a second key.