Graphics Programs Reference
In-Depth Information
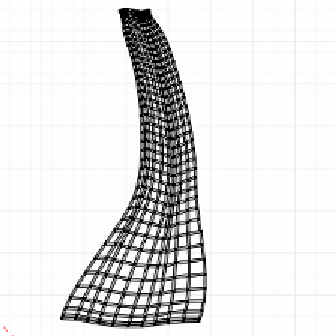
5. Switch to
Edit Mode
(
Tab
key) to work on the shell mesh, then select all the verices
(
A
key, once or twice), go to the
Tool Shelf
, apply the
Smooth Vertex
tool, and set
its
Smooth Iterations
parameter to
100
. This way, we get a very thin, curly shape
that resembles the shape of the shell.
6. Now let's go to
Mesh → UV Unwrap... → Unwrap
and then go to the
Tool Shelf
to set the
Method
parameter to
Conformal
. After this, we can take a look at the
UV/Image Editor
and see the unwrapped mesh.
Now let's go to the
UV/Image Editor
, select all the verices (
A
key, once or twice),
scale them by a factor of 3.5 along the X axis (
S
key,
X
key, then type
3.5
), move
them close to the center of the grid, and then scale them down by a factor of 0.95 (
S
key, then type
0.95
). This will give us the final UV Map that we need for our shading
process. Let's take a look at the next screenshot showing the finalized UV Map:
7.
l
At this point, we have a nice and clean UV Map.
Let's switch to
Object Mode
(
Tab
key), go to the
Object Data
tab of the
Properties
Editor
, make sure the
Key 1
item is selected (
Shape Keys
panel), delete it, then
select the
Basis
item, and delete that as well.
Noice that the
UV Texture
panel now has an entry called
UVTex
, which represents
the UV Map, created automaically when we unwrapped the mesh. As a inal check,
let's make sure that the shell shape is kept intact ater deleing the shape keys, and
the UV Map that we created is also preserved.
8.