Graphics Programs Reference
In-Depth Information
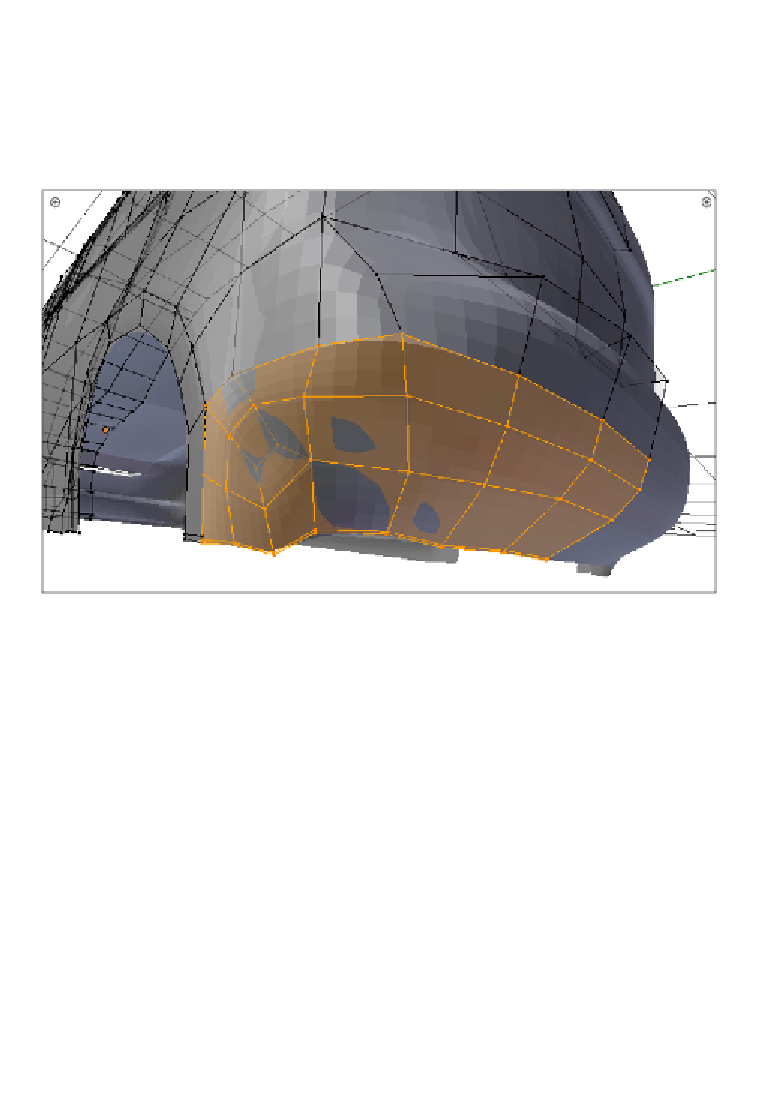
46. Finally, one last patch: The rear bumper. The process for this is very easy; just select
all the edges of the lower border of the rear bumper patch, duplicate them, and
perform three extrusions downwards; we must be careful, though, since there are a
couple of three edge poles that we need to create in the verical corner of the patch.
Since this is easier to understand with an image, let's look at the resuling patch in
this screenshot:
The screenshot shows what the subdivided version of the mesh looks like. Let's also add a
Subdivision Surfaces modifier to the object and look around for the nice curvature that our
mesh exhibits.
Objective Complete- Mini Debriefing
This part of the process was about sketching. Our purpose in doing this is just to get a
good basic shape for our model, but avoid the complexity of handling dense meshes. The
separaion into patches is needed so that we can concentrate on one small part at a ime.
This lets us plan the local topology and defer the connecion between the diferent parts for
later. This will allow us to work a bit more on solving certain topology issues.
Since we are working with a blueprint, the quad view opion is very handy to get a good
glimpse of the shape, and how the separate parts are being correctly posiioned in space.