Graphics Programs Reference
In-Depth Information
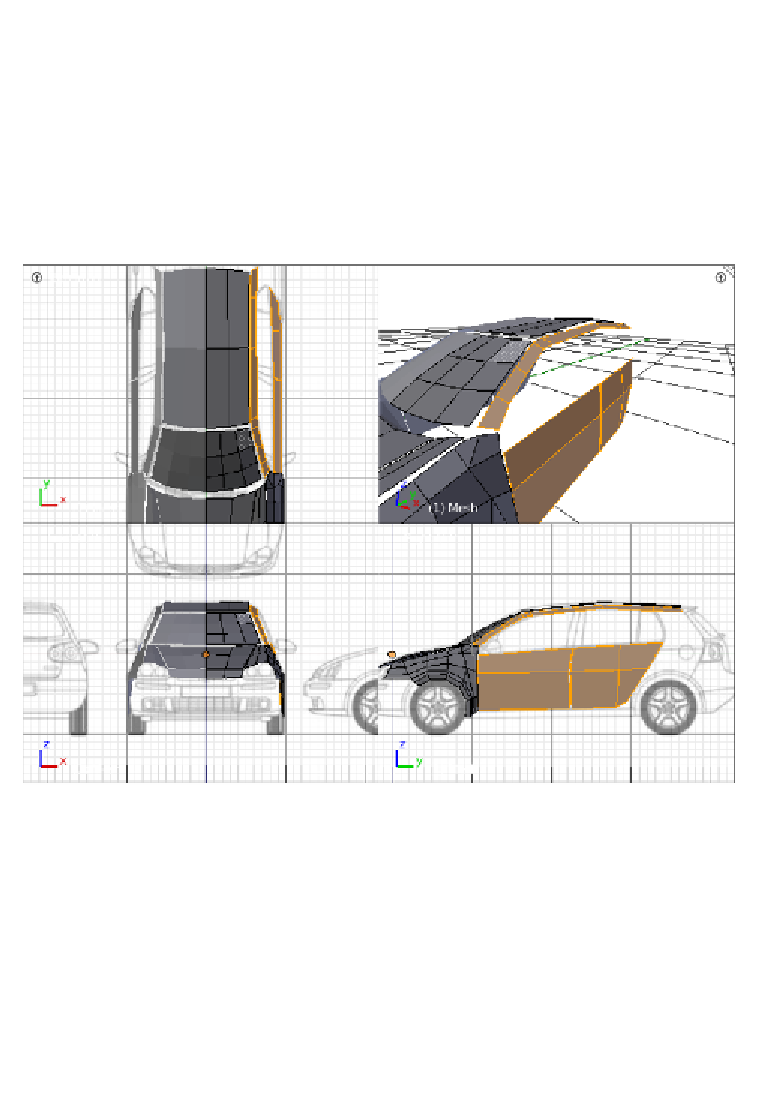
25. Then extrude the upper edge just a bit, to get the extruded edge next to the side of
the roof patch and finish the strip by performing three successive extrusions, going
in the posiive direcion of the Y axis (alongside the roof). The irst extrusion must
get aligned with the edge loop running across the roof around the middle of it, the
second must end in the very place where the second door ends, and the third one
must end aligned with the last border of the roof patch. Of course, we must take
some ime to carefully tweak the new geometry, to create a good shape with it.
Let's look at a screenshot to get a clear idea of what the final shape of these patches
should be:
How about taking a couple of minutes to look around the shape and the geometry
that we created? At this point, the shape of the car is evident with just a few patches
of geometry, which is very useful because we can see how well our modeling task is
going ater creaing just a few faces organized into simple patches. The idea of the
patches is very useful because it allows concentraing on the form at the beginning,
and leaving the difficult topological problems for later (the easy ones are solved
immediately, such as the poles we worked on in the front fender).
The next patch that we are going to create is the one defining the front bumper of
the car and is easy to work on in the right view. The process is very straighforward,
even though it (of course) requires some hand tweaking.


