Java Reference
In-Depth Information
The first change is done on the
@ServerEndpoint
annotation. We have to define a list
of supported encoders; we simply pass our
JSONEncoder.class
wrapped in an array.
Additionally, we have to pass the endpoint name using the
value
attribute.
Earlier, we used the
sendText
method to pass a string containing a manually created
JSON. Now, we want to send an object and let the encoder handle the JSON generation;
therefore, we'll use the
getAsyncRemote().sendObject()
method. And that's all.
Our endpoint is ready to be used. It will work the same as the earlier version, but now our
objects will be fully serialized to JSON, so they will contain every field, not only
id
and
booked
.
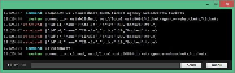
After deploying the server, you can connect to the WebSocket endpoint using one of the
Chrome extensions, for instance, the
Dark WebSocket
terminal from the Chrome store
(use the
ws://localhost:8080/ticket-agency-websockets/tickets
ad-
dress). When you book tickets using the web application, the WebSocket terminal should
show something similar to the output shown in the following screenshot:
Of course, it is possible to use different formats other than JSON. If you want to achieve
better performance (when it comes to the serialization time and payload size), you may
want to try out binary serializers such as
Kryo
(
https://github.com/EsotericSoftware/
like to use WebSockets for other clients too.
Tyrus
(
https://tyrus.java.net/
) is a reference
implementation of the WebSocket standard for Java; you can use it in your standalone
desktop applications. In that case, besides the encoder (which is used to send messages),
you would also need to create a decoder, which can automatically transform incoming
messages.