Graphics Programs Reference
In-Depth Information
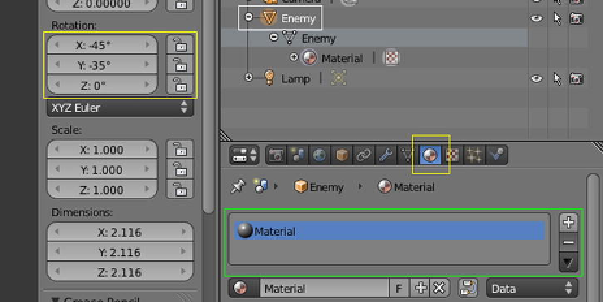
you created. The rotation values for the object have been set from the
propertiesshelf
(highlighted in yellow border in
Figure 4-29
), so that it becomes (almost) parallel to
the grid surface.
Figure 4-29
.
Material context in Properties Window
This object represents the enemy, shown in Figure 2-6. Before making more changes
to this file, select
View
➤
Top
from the
3DView
header. This aligns the global axes in
Blender, along with the
right handed
OpenGL ES coordinate system (Figure 3-17),
making it easy to edit the positions of objects added to the world-space of the
3D
View
.
Now, continue editing this file. From the
properties shelf
, set the location of this ob-
ject to {10.0, 10.0, and 0.0} for X, Y, and Z, respectively. This moves the object near
the top-right corner of the grid. From the
Outliner
window, double-click the object
label “Cube.” This allows you to rename the object. Set the name to “Enemy,” and
press
Enter
. Similarly, rename the cascaded label (along small “plus” button) “Cube”
to “Enemy.” Click the “plus” button to reveal the object material.
Expand the
Outliner
window by dragging the resizable-cursor. This cursor appears
when you position the mouse pointer at the border of any window in Blender. In this
case, expand the left border of the
Outliner
window. Windows layed above or below
the
Outliner
window are also expanded. Now, turn your attention to the
Properties
window (
Figure 4-29
).
Material Context
Search WWH ::

Custom Search