Game Development Reference
In-Depth Information
3.
Mappy will warn you that you will now need to import a tile sheet into the program. In the
File menu, choose Import and then select the
tank_sheet.png
file we created in GIMP.
4.
The tiles will show up in the right-hand window. Take a close look at the tile sheet, and
you will notice that a blank tile has been inserted at the beginning of the tile sheet. This
is useful for deleting tiles from your map but isn't an actual tile in your sheet. This
detail will be important when we need to export our data for use in Flash.
Creating a two-layer map
We are going to use Mappy to create two layers for our level tile map. The first layer we will
create (Layer 0) will be the background layer. The second layer (Layer 1) will be for all for the
sprite objects.
Creating the background layer
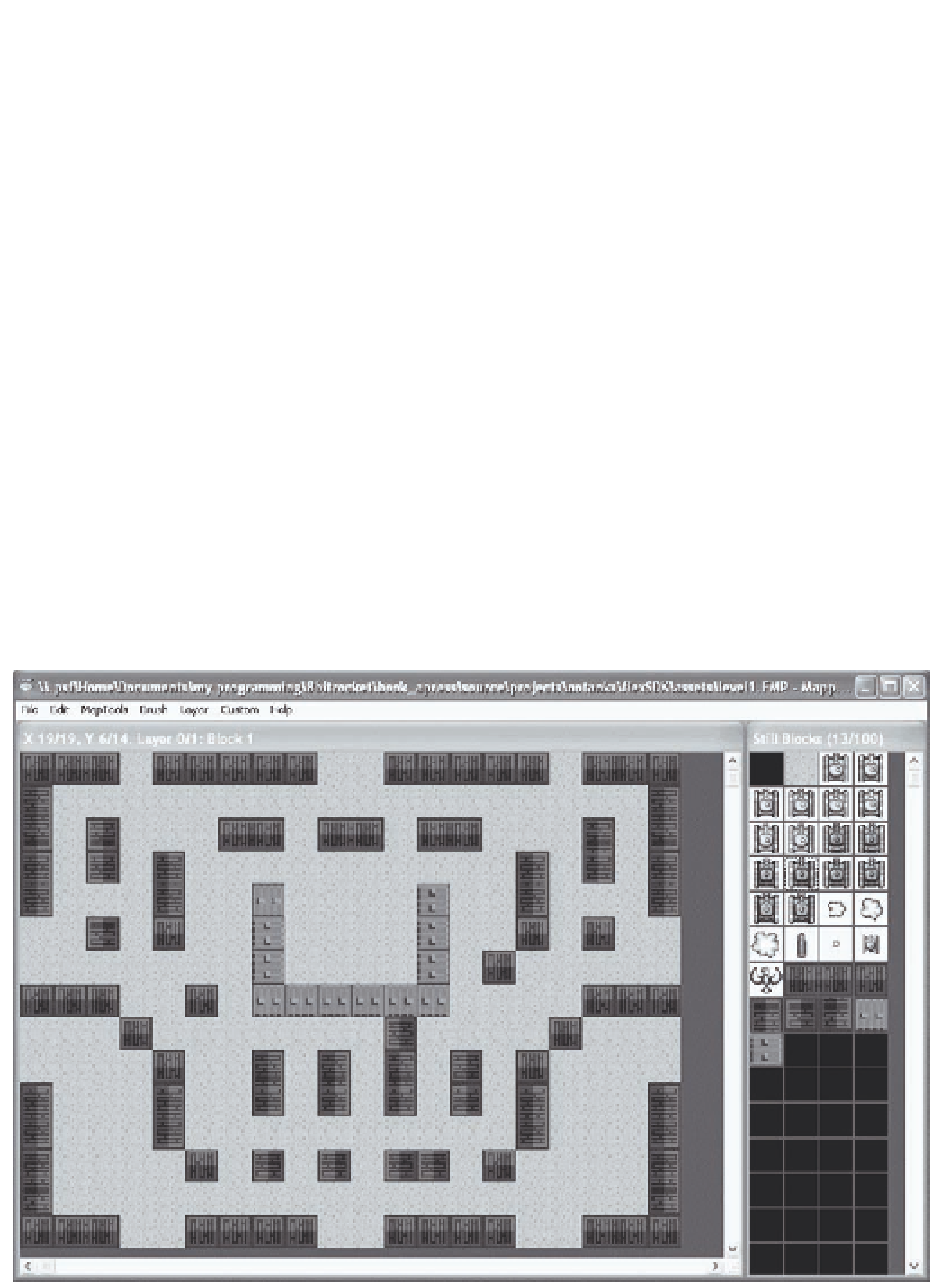
This layer will consist of only the road tile (Mappy tile 1) and the wall tiles (Mappy tiles 25-32).
You will notice that because Mappy has added the eraser tile at the beginning of the tile sheet
that our Mappy tile numbers for our tiles are 1 greater than those in our tile sheet. Don't worry;
when we export out tile map from Mappy, we will automatically subtract 1 from each our Mappy
tile IDs so they will match our tile sheet IDs.
Using the road and wall tiles, create a tile map that looks something like Figure 6-7.
Figure 6-7.
A sample level in Mappy for No Tanks!