Graphics Programs Reference
In-Depth Information
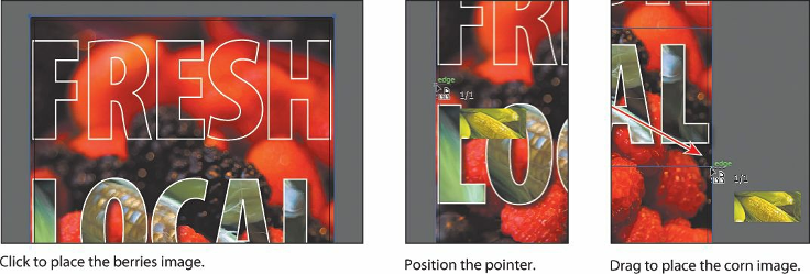
4.
Position the loaded graphics cursor in the upper-left corner of the artboard, where the
red bleed guides meet. Press the right or left arrow key (or up and down arrow keys) a
few times to see that you can cycle between the image thumbnails. Whichever
thumbnail is showing when you click in the Document window is placed. Make sure
that you see the berries image thumbnail, and click to place.
5.
Choose Object > Arrange > Send To Back.
6.
Position the loaded graphics cursor on the left bleed guide (off the left side of the
artboard), just above the text “LOCAL.” When the word “edge” appears, click and
drag down and to the right, stopping at the red bleed guide off the right side of the
artboard when the word “edge” appears. Release the mouse button.
7.
Choose Object > Arrange > Send To Back, and leave the corn image selected.
You can either click to place an image at 100% or click and drag to place an image and size
it as you place it in the Document window.
8.
With the corn image selected, Shift-click in the word “LOCAL” to select both objects.
Release the Shift key, and then click the word “LOCAL” to set it as the key object.
You will align the corn image you just placed to the word.