Graphics Programs Reference
In-Depth Information
3D effects that you can apply to artwork: Extrude & Bevel, Revolve, and Rotate. Below are
visual examples of each type of 3D effect:
Applying an Extrude & Bevel effect
The Extrude & Bevel effect extrudes a shape along the z axis to extrude the shape. For
example, applying the effect to a circle will extrude it to create a cylinder. Next, you'll apply
the Extrude & Bevel 3D effect to the text “Joe's GYM.”
1.
With the Selection tool ( ), click to select the yellow text “Joe's GYM.”
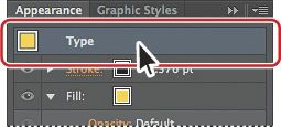
2.
In the Appearance panel, click the top row with the word “Type” to select it. This will
apply the 3D effect to the entire type object, not just to the fill or the stroke.
Tip
You can apply 2D artwork stored as a symbol in the Symbols panel to
selected surfaces on a 3D object. To learn about mapping symbols to 3D
artwork, see the PDF file, in the Lesson_extras folder, called
3DArtwork.pdf.
3.
Choose Effect > 3D > Extrude & Bevel. In the 3D Extrude & Bevel Options dialog
box, select Preview. Reposition the dialog box so that you can see the text in the
Document window, and set the following options:
• X axis:
4°
(controls the rotation around the x axis)
• Y axis: -
30°
(controls the rotation around the y axis)
• Z axis:
0
(the default setting, which controls the rotation around the z axis)
• Perspective:
125°
(You can either type the value directly or click the arrow to drag a
slider to change the value.)
• Extrude Depth:
90 pt
(controls the depth of the object)
• Bevel:
None
(the default setting, which can apply a beveled edge)