Graphics Programs Reference
In-Depth Information
8.
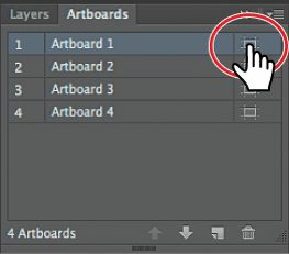
Click the Artboards panel icon ( ) to show the Artboards panel (Window >
Artboards). Click the name “Artboard 1” in the Artboards panel to make it the active
artboard.
This is the original artboard. Notice that a dark border appears around Artboard 1 in
the Document window. This indicates that it is active. There can only be one active
artboard at a time. Commands such as View > Fit Artboard In Window apply to the
active artboard.
Next, you will edit the active artboard size by choosing a preset value.
9.
Click the Artboard Options button ( ) to the right of the name “Artboard 1” in the
Artboards panel. This opens the Artboard Options dialog box.
Tip
The Artboard Options button appears to the right of the name of each
artboard in the Artboards panel. It not only allows access to the artboard
options for each artboard but also indicates the orientation of the artboard.
10.
Find the reference point locator ( ) to the left of the X and Y values, and make sure
that the upper-left point is still selected. This ensures that the artboard is resized from
the upper-left corner. Choose Letter from the Preset menu, and click OK.