Graphics Programs Reference
In-Depth Information
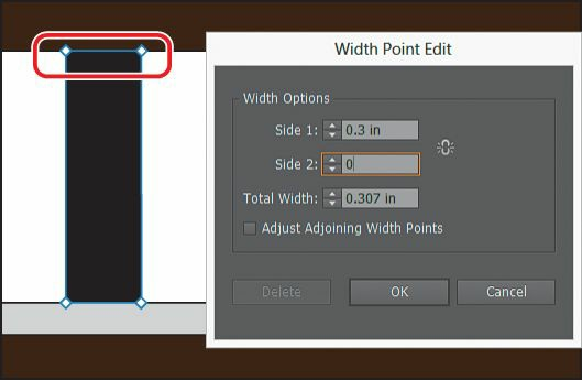
open the Width Point Edit dialog box. Change the Side 1 width to
.3 in
. Make sure that
Side 2 is set to
0,
and click OK.
The Width Point Edit dialog box allows you to adjust the sides together or separately,
using more precision. Clicking the Adjust Widths Proportionately button ( ) would
link Side 1 with Side 2 so that they adjust together, in proportion. Also, if you select
the Adjust Adjoining Width Points option, changes to the selected width point affect
neighboring width points, as well.
Tip
You can use the Width Point Edit dialog box to ensure that width points are
the same.
10.
Position the pointer over the bottom width point or handle of the line. When the pointer
changes ( ), double-click to open the Width Point Edit dialog box. Change the Side 1
width to
.3 in
. Make sure that Side 2 is set to
0 in
, and click OK.
11.
Position the pointer over the middle of the line (indicated by the X in the figure). Click
and drag to the right until you see a Side 1 width of approximately .06 in.