Image Processing Reference
In-Depth Information
The prerequisite is that the selected image object should stand out to
some extent from the rest of the image.
• Open the
girl.png
image in the
SampleImages
folder on the DVD.
• Save it as
extractinghair.xcf
in the layer-enabled XCF format.
• Select the
Image > Mode
menu item and make sure the image is in
RGB
mode
; if it isn't, change the mode.
• Duplicate the
Background
layer (in the
Layers
dialog). Name
the new layer
mask
.
• Make sure the layer has an alpha channel (transparency
attributes) by right-clicking in the
Layers
dialog and
choosing
Add Alpha Channel
from the context menu, thus
adding transparency to the layer.
• Use the
Threshold
function (
Color > Threshold
) to set the
mask
layer so that the hair strands are fully displayed—
there should be an adequate amount of contrast between
the hair and the background of the image. Be aware that a
solitary hair is extremely difficult to capture, even with this
wonderful tool.
• When the hair is deined by contrast, choose
Select > By Color
(or use the
Select by Color
tool
) to create a selection on the
white image areas on the
mask
layer. So that you can work as
accurately as possible, the selection should be sharp edged,
i.e., no feathering.
• Choose
Edit > Clear
to delete the white image areas. Check
the result.
• Create a selection across the image areas surrounded by the
hair contour. In this case, that would be the face.
• Choose the
Edit > Fill with FG Color
menu item to fill the
selection on the
mask
layer with black.
• If you have done everything right, the contour of the head
with hair should be selected. If not, delete the old selection
and create a new one. Right-click on the
mask
layer in the
Layers
dialog to open the context menu of this layer. Select
the
Alpha to Selection
option.
• In the image window, click the bottom-left icon to activate the
Toggle
Quick Mask
. You can also select it from within the
Select
menu.
• Before you proceed, make the
mask
layer invisible by clicking the layer's
eye icon in the
Layers
dialog.
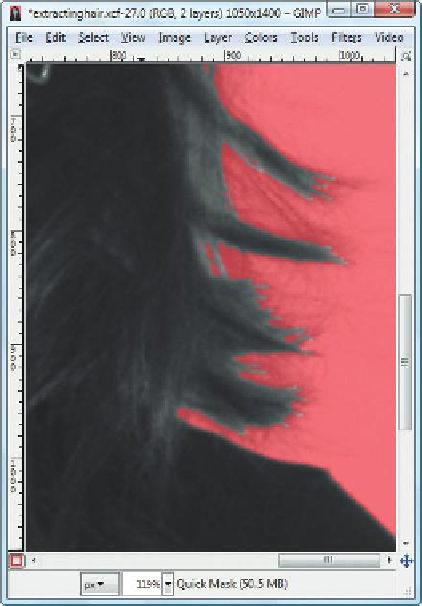
• You are now ready to do some touchup work on the reddish mask.
Select the
Paintbrush tool
with a thin, soft brush pointer (depending on
the image and its resolution; in this case, use 5 to 9 pixels). Touch up the
incomplete hair strands in the example image. You may have to paint or
erase the reddish mask to correct the hair jutting out. Remember, black
color paints a mask and white erases it.
Figure 4.17
Touched-up hair strands on the mask with the
Background layer visible from underneath


Search WWH ::

Custom Search