Image Processing Reference
In-Depth Information
Step 4: Tone Mapping to Adapt
the Rendition to the Monitor
and Printer
In order to attain an optimal
rendition of an HDR image file
on the monitor and printer
that matches their capabilities
for rendering contrast ranges
brightness and color, you must
carry out a tone mapping
procedure. Thus you generate
a file that defines the selected
settings and features in a way in
which the image can be saved and
reproduced on the monitor and
the printer.
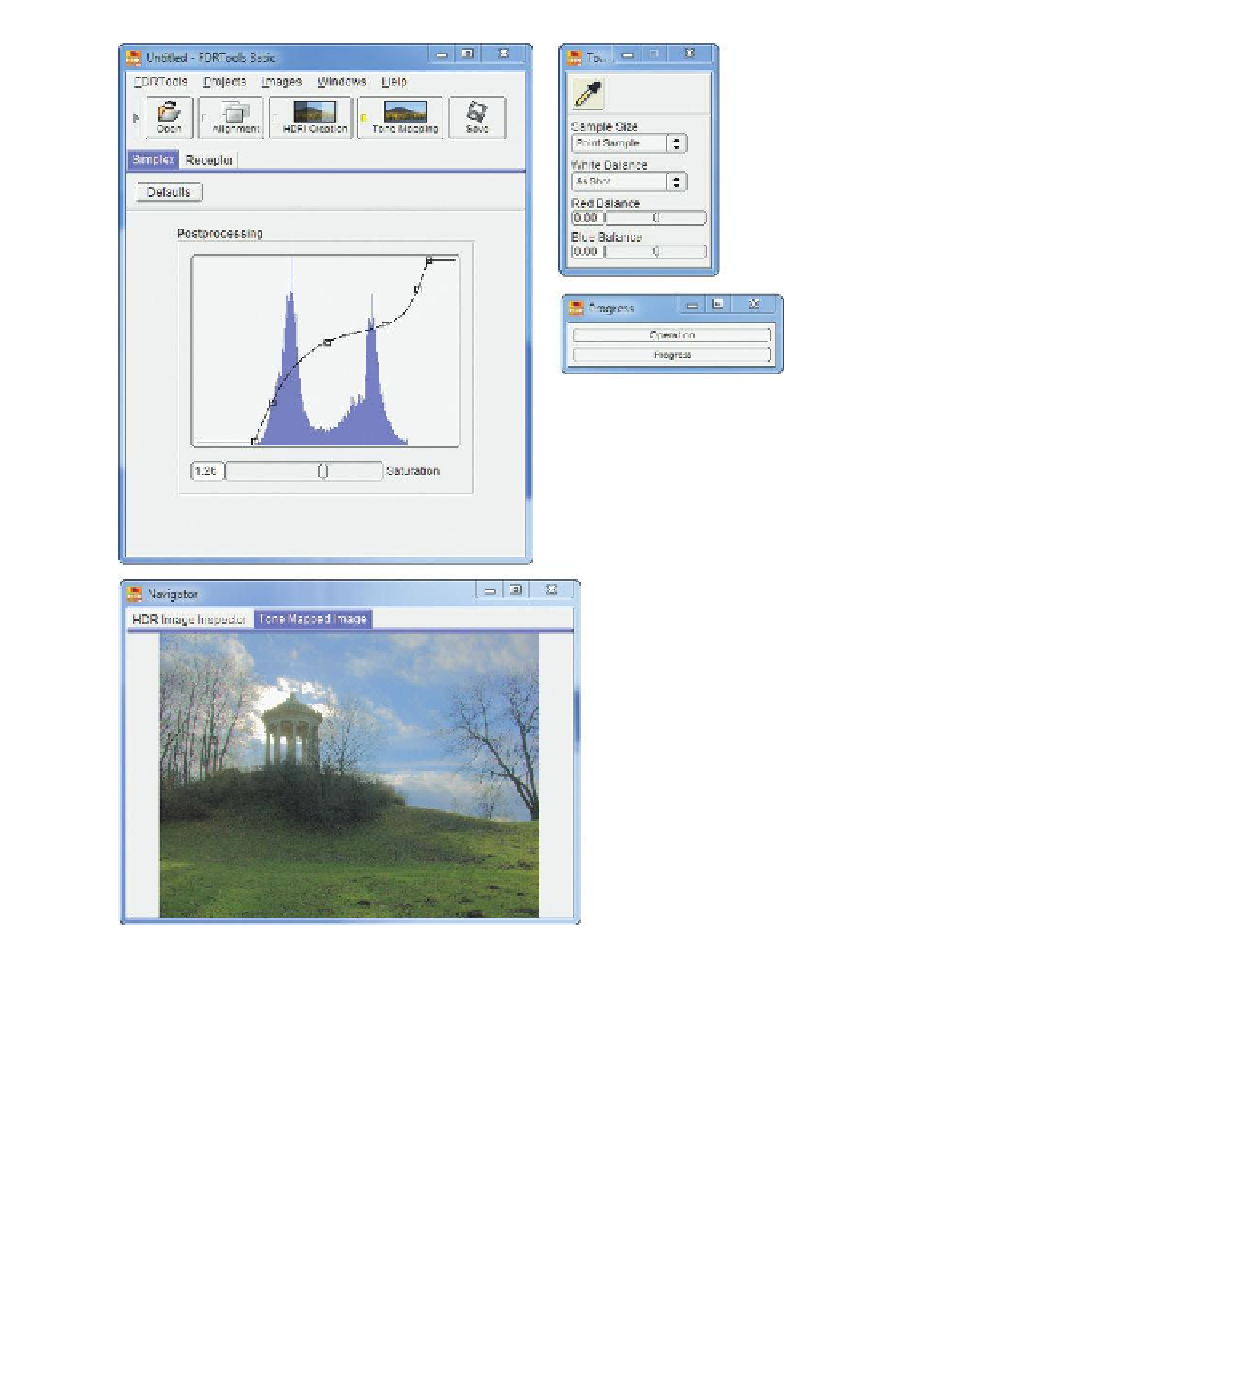
Select the
Tone Mapping
feature by clicking on the button in
the main window of the FDRTools
program. A histogram appears in
the main window, as depicted in
figure 3.122.
A new tab opens up in the
main window:
Simplex
. It offers
a
simplified
method
of
tone
mapping.
Under
Postprocessing
you
can see a processed histogram of
the image. The window offers the
possibility to edit gradation curves,
brightness, contrast, and colors
in the image. This function relates
to what you have already seen in
GIMP'S
Colors > Curves
(section
2.5.9). By moving the
Saturation
slider under the histogram, you can define the intensity of the colors.
Now the
Tone Mapped Image
tab is active in the
Navigator
window. The
image in the
Navigator
is a preview according to the settings in the main
window.
Figure 3.122
Tone mapping in FDRTools using the Simplex method


Search WWH ::

Custom Search