Image Processing Reference
In-Depth Information
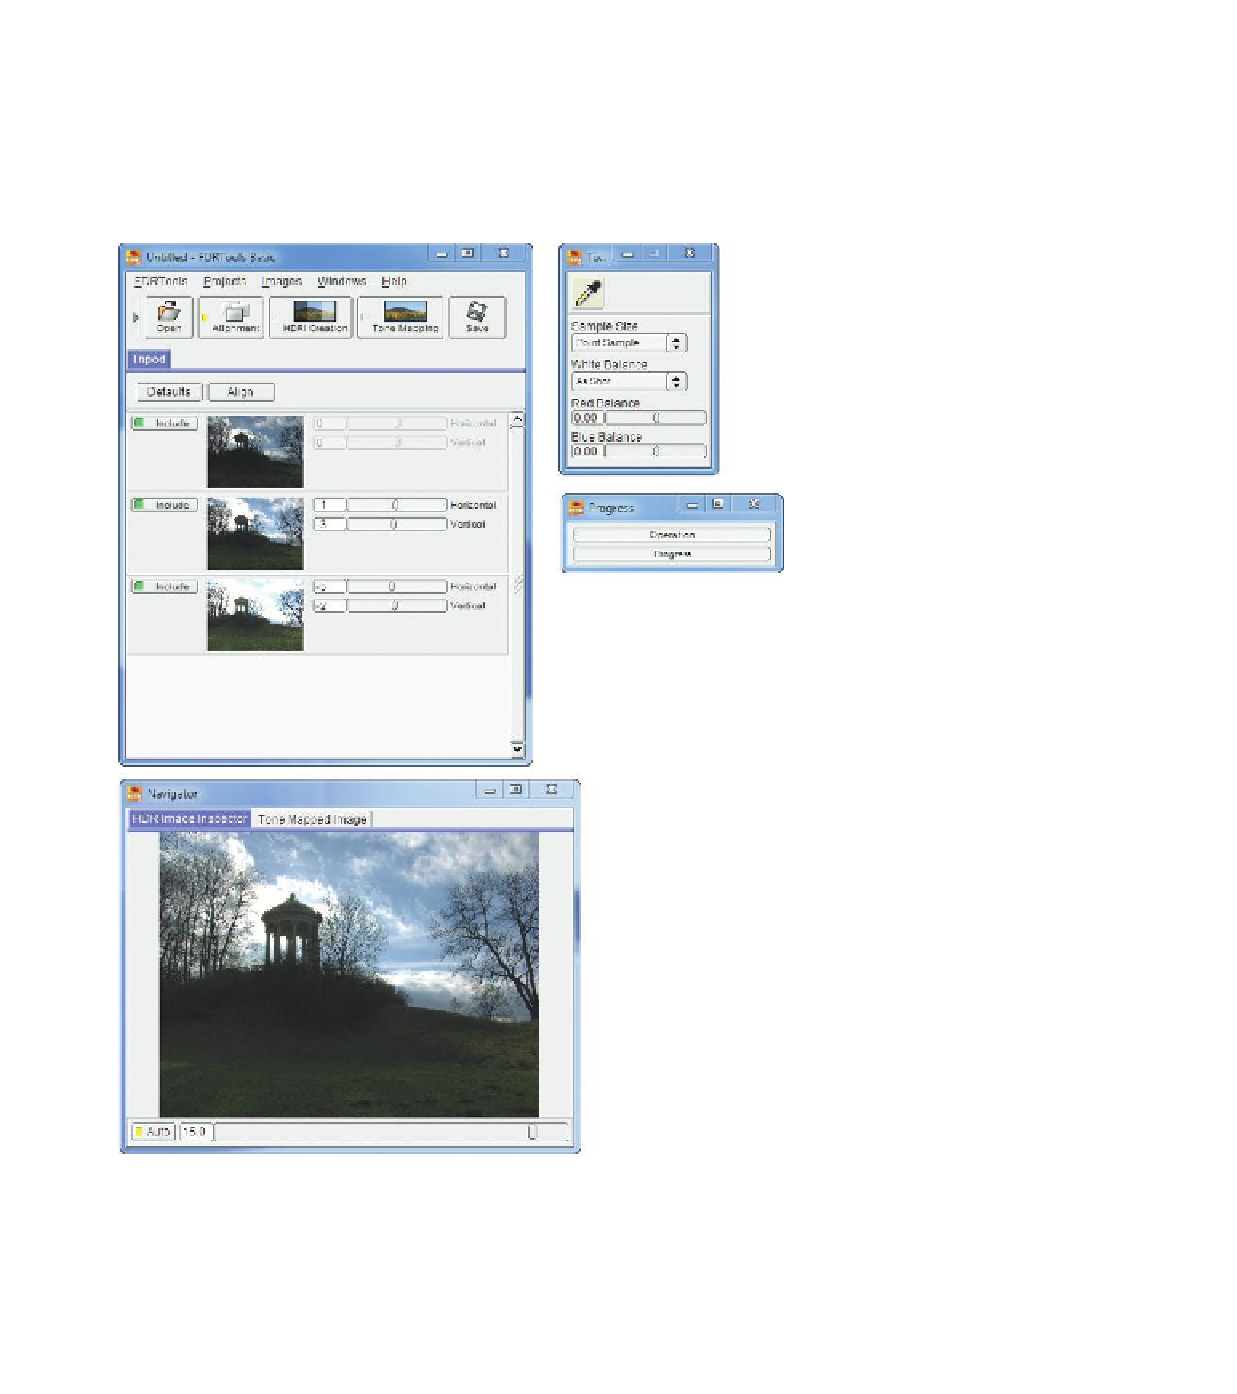
After the pictures are imported, the main FDRTools window will display
the opened files. The program creates a new project. On the left next to the
preview images you will find three buttons:
Prepare
,
Edit
, and
Render
.
Click
Prepare
. The program prepares the images for further editing, as you
will see in the progress bar in the
Progress
window. The preparation takes
some time, but in the long run it saves time.
Step 2: Automatic Alignment
After the
Prepare
function has
finished processing, click the
Edit
button. The main window
changes its appearance. Again the
program processes the images
automatically and aligns them
to each other.
The HDR Image
Inspector
at the bottom displays
the first preview of the merged
HDR image.
A small green box next to
the
Include
button indicates that
all three images have been linked
together. This means that the HDR
image will be processed with all
the tagged images. You can take
out or add an image simply by
clicking on the
Include
button.
Figure 3.120
The main window with the opened and already aligned images. The Navigator is
depicting the HDR image, corresponding to the actual settings.


Search WWH ::

Custom Search