Image Processing Reference
In-Depth Information
This was necessary when I was editing the image; the trees
came out better when they were depicted as whole on the
topmost layer. Therefore, I had to subsequently erase the mask
covering the trees in the
details-highlights
layer.
This way of working is very labor intensive, but the
finished image is rather satisfactory. The method to create a
“real” HDR image with the appropriate program is somewhat
easier. Basically, it depends on the right choice of program
settings. You will have to experiment a little. This can take some
time as the processing of the finished HDR image takes time,
depending on the file size.
Compare the three images (
igure 3.116
,
figure 3.117
, and
igure 3.118
): the reference image that hasn't been edited since
it was taken, the LDR image that was created with GIMP by
blending the images, and the“real” HDR image that was created
with FDRTools Basic. We will take a closer look at creating HDR
images in the following section.
I have listed here links to interesting tutorials and examples
suggesting similar methods of editing bracketed images in
GIMP:
A good tutorial:
•
http://www.gimp.org/tutorials/Blending_Exposures/
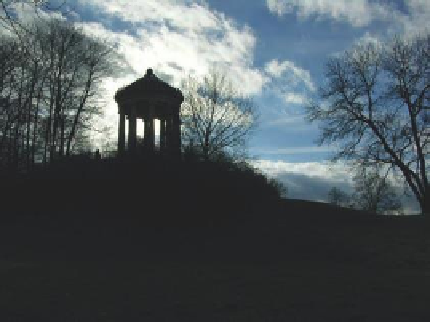
Figure 3.116
The reference JPEG image from the camera
And two further tutorials:
•
http://www.luminous-landscape.com/tutorials/digital-
blending.shtml
•
http://en.wik ibooks.org/wik i/The_GIMP/Blending_
Exposures
Figure 3.117
The HDR image created with FDRTools
On the topic of HDR formats:
•
http://www.linux.com/articles/50413
And an article on HDRI in Wikipedia:
•
http://en.wikipedia.org/wiki/High_Dynamic_Range_
Image
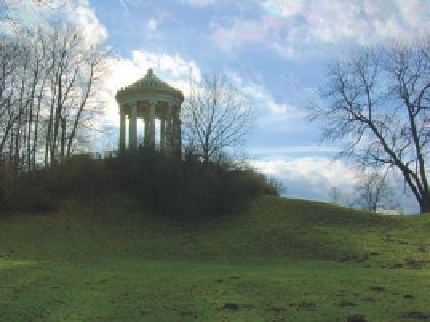
Figure 3.118
The pseudo HDR image created with GIMP


Search WWH ::

Custom Search