Image Processing Reference
In-Depth Information
You don't have to rotate the image, so leave the
Options
value
for
Rotate
at 0. The bulging section in the picture is located more at
the top, so you can leave
Upper
selected under
Curve for Border
. At
first you'll see a horizontal line in the
Modify Curves
graph. Drag the
line from the middle section downward (as depicted in
figure 3.17).
Check the result in the preview window. When you are satisfied,
confirm the results by clicking the
OK
button.
Verify your image along the grid lines. I used the
Perspective
tool
to raise the drainpipe at the top-right corner of the building. In
addition, I used the
Scale tool
to stretch the vertical lines a little.
The result for all the hard work is a straightened and almost
right-angled illustration of our Art Nouveau building.
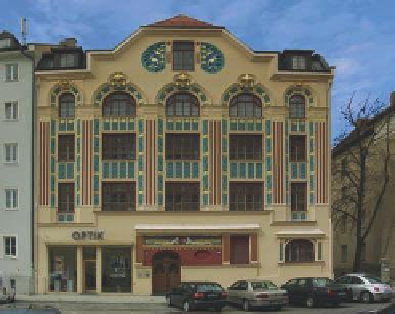
Figure 3.18
shows the image before editing, and
igure 3.19
shows it after.
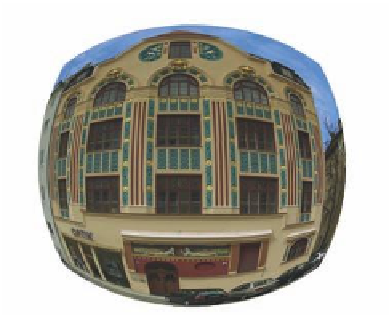
Figure 3.20
is an attempt to imitate a photo taken with
a fisheye lens. Distortions like this are necessary if the image content
should be mirrored on a concave surface. I applied the filter several
times in a row to reach this effect, applying
Edge
at maximum level.
The technique described may not work when rectifying
distortions that occur when photographing very high buildings.
You would have to severely lengthen the building to prevent it from
looking disproportionate after the correction. Doing this would
cause perspective flaws in the window embrasures to stand out.
Figure 3.18
The original image in comparison
3.5.6 The Perspective Clone Tool
Originally, to introduce a new image element into another image
with the correct perspective, GIMP only had the transformation tools,
such as the
Perspective
tool
. Since GIMP 2.4, we have the additional
choice of the
Perspective Clone tool
to copy sections from an image
with the help of a clone tool. These sections can then be placed into
the intended image in the correct perspective.
The intended use of this tool is to cover up trouble spots in
digital photography with image content in the correct perspective.
Figure 3.19
The result of editing to reduce the lens distortion of the
building
Copying Image Content and Inserting the Image in the
Correct Perspective
It is important to mention that this tool requires accurate work. It
takes time to learn how to use the
Perspective Clone tool
. First you
have to apply the perspective of the image area to be corrected as
exactly as possible with the help of the tool. You can work on only
one perspective surface at a time. As in our example image, you can
Figure 3.20
Fisheye distortion of the building


Search WWH ::

Custom Search