Graphics Programs Reference
In-Depth Information
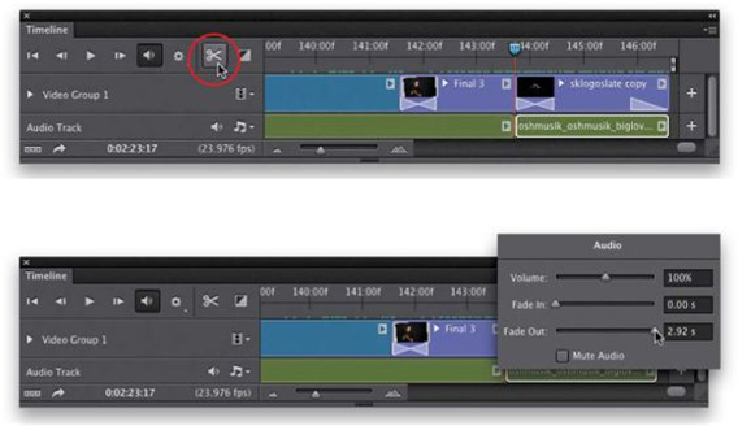
but that seems like a logical place). So, click in the time ruler, at the top of the timeline,
right between where the Final 3.jpg image ends and the logo slide at the end of the movie
starts to move the playhead there. Click on the green audio track (so just it is selected),
then click on the Split at Playhead icon (the scissors) on the left side of the timeline (shown
circled above in red). This splits the audio track into two clips at that point (although they
still play as one). Click on the smaller audio clip on the right to select just that part, then
click on the right-facing triangle at the top-right corner of the thumbnail to bring up the
Audio options (seen here). Drag the Fade Out slider all the way to right, so by the end of
the clip, the audio will have totally faded out. Now, play those last few clips and both the
audio and video fade out like they should.
When you click the Split at Playhead icon, it splits the audio clip at that spot
The Fade Out slider lets you pick when you want the audio to be totally faded-out
Step 13:
You probably noticed another problem: you still hear any audio your camera's mic picked
up when you made these video clips. That's usually great, but in our case we just want to
hear the background music, not the audio from the clips. So, what you have to do is click
on each individual clip, then click on the right-facing triangle at the top-right corner of the
thumbnail to bring up the Video options. Click on the Audio icon (the music notes) and
then turn on the Mute Audio checkbox to silence the audio embedded in that video track.
Yes, you have to do this to each track one-at-a-time. I know. Ugh.