Graphics Programs Reference
In-Depth Information
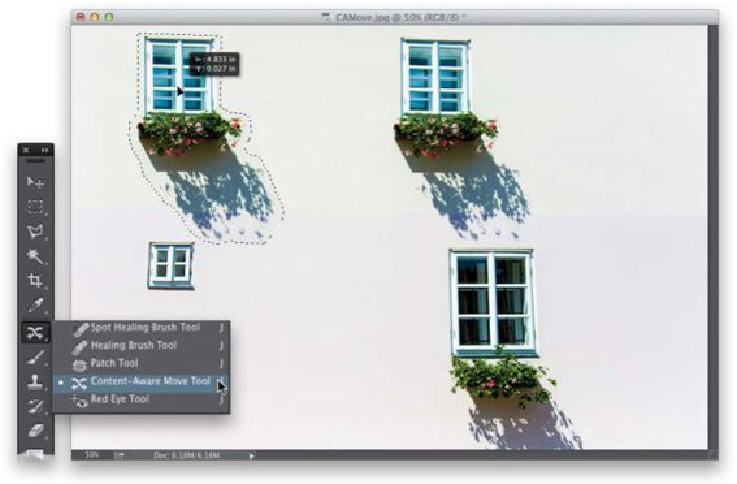
Step Four:
When you release your mouse button, it's going to take a few moments for the magic to
happen (depending on how large your file size is), but then you'll see that not only are your
subjects moved, but the hole that would normally have been left behind is instead totally
patched and filled (as shown here). However, don't deselect quite yet. Leave your selection
inplace—especiallyifitdidn'tworkwell—becausewhileit'sstillselected,youcanchange
how Photoshop creates the background texture and color that blends with your move. You
do this from the Adaptation pop-up menu up in the Options Bar. What's nice is, since your
selection is still in place, you can choose a different option from that menu and it will re-
render your move. So, all you have to do is try each one at different settings and choose
the one that looks the best (again, I do this only if there's a problem). Also, the higher the
number you choose, the more Photoshop uses of the actual real background to create the
texture or color blending. This looks more realistic in some cases, but it can make the move
look weird in others, so it's best to try both high and low numbers if it just doesn't look
right. (
Note:
If needed, you can also switch to the Spot Healing Brush and clean up any
stray areas it left behind.)