Graphics Programs Reference
In-Depth Information
TIP: Cherry-Picking the HDR
Here, we simply lowered the Opacity of the top layer to let the entire HDR image bleed
through a bit, but another strategy is to leave the Opacity at 100% and add a layer mask
instead. Then, just paint in black with a soft-edged brush over the areas you want to have
more of an HDR look (like the floor, bookcases, or ceiling). Lower the Opacity of the brush
itself (up in the Options Bar) to 50% before you start painting, so the effect is more subtle.
Getting the HDR Look on a Single Image
If you didn't take bracketed images in your camera, but you still want that HDR look, you
can pretty much do the entire thing right in Camera Raw by pushing a few sliders to the
max. Here's how it's done:
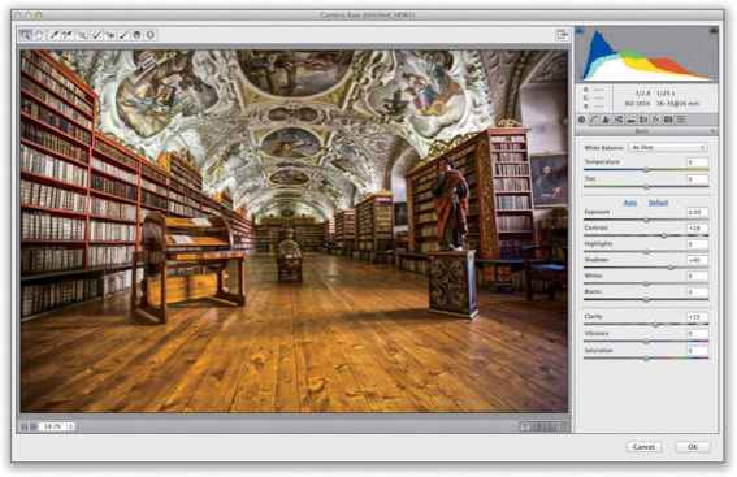
Step One:
Here's the original single-image exposure, and it's the perfect kind of image to apply an
HDR look to. There's a wide tonal gap between the bright light coming in from the win-
dows and the dark shadows in the rest of the image; plus, things with lots of texture and
detail tend to look great as HDR images, and if they look great as HDR, they'll look great
withanHDReffectapplied, eventhoughwe'reapplyingittoasingleimage. Startbyopen-
ing the image in Camera Raw. Here's the basic recipe we follow: crank up the Shadows all