Graphics Programs Reference
In-Depth Information
Fixing Skies (and Other Stuff) with the Graduated Filter
The Graduated Filter (which acts more like a tool) lets you recreate the look of a traditional
neutral density gradient filter (these are glass or plastic filters that are dark on the top and
then graduate down to fully transparent). They're popular with landscape photographers
because you're either going to get a photo with a perfectly exposed foreground, or a per-
fectly exposed sky, but not both. However, with the way Adobe implemented this feature,
you can use it for much more than just neutral density gradient effects (although that prob-
ably will still be its number one use).
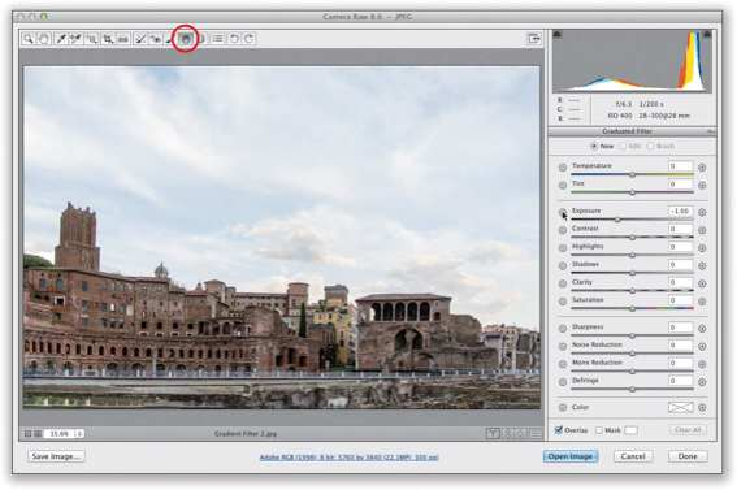
Step One:
Start by selecting the Graduated Filter tool
(G)
up in the toolbar (it's shown circled in red
here). When you click on it, its options panel appears (shown here) with a set of effects
you can apply that are similar to the ones you can apply using the Adjustment Brush. Here
we're going to replicate the look of a traditional neutral density gradient filter and darken
the sky. Start by dragging the Exposure slider to the left, or just click on the - (minus sign)
button two times to get to -1.00 (as shown here).
SCOTT KELBY
Step Two: