Graphics Programs Reference
In-Depth Information
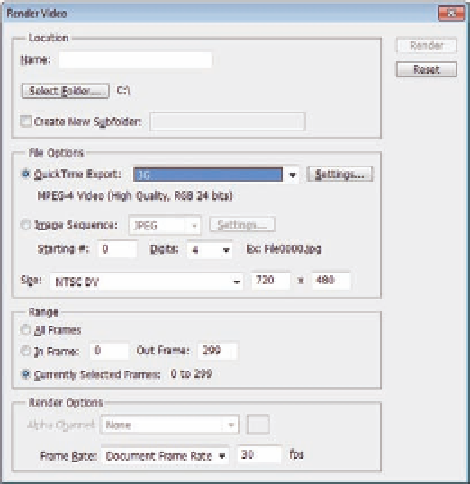
Figure 13.1
The Video Render dialog
box.
After you inish your 3D animation project and set its render options, you are
now ready to render your project by selecting the File
>
Export
>
Render
Video. The Render Video dialog box includes four main section: Location, File
Options, Range, and Render Options.
Location
The Location section is where you set the name of the video and the save
location. You can also create a new subfolder in which to save the iles by
checking the Create Subfolder checkbox and adding the name of the
new folder.
File Options
When you export your 3D animation to video or sequence images, you have
a wide range of formats to choose from. The File Options section includes a
variety of formats for either video or sequence images.
Video Export
Let's start by discovering the video formats in the QuickTime Export drop-
down list and the setting available for each format. The video export
supports the following formats:
Note: You must have the
FLV QuickTime encoder
installed to be able to
export video as FLV
video.
•
3G mobile video
•
FLC, video animation
•
FLV, Flash video