Hardware Reference
In-Depth Information
Figure 13.10
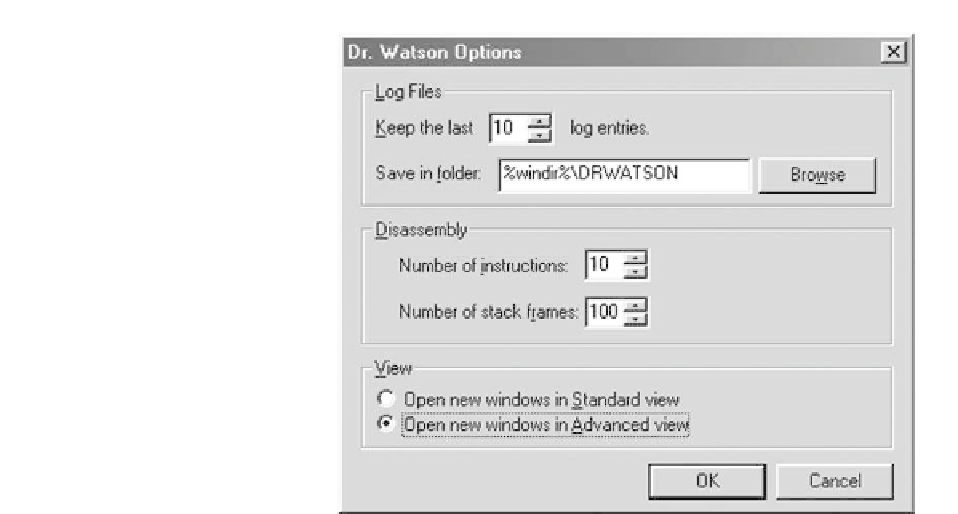
Dr. Watson provides a limited range of configuration options
(see text)
(b)
On the File menu, click Open.
(c)
Open the folder where the Dr. Watson log is saved.
(d)
In the Files of type list, click Dr. Watson Log File (*.wlg).
(e)
Click the file, and then click Open.
10
To print Dr. Watson log files, click on Print from the File menu. To print
only specific information, you can use Microsoft System Information to
view the log file, and then copy the specific information to an ASCII text
editor, such as Microsoft Notepad. (Note that, depending on the software
that happens to be running, a typical Dr. Watson log file can amount to more
than 15 pages of A4 text!)
Dr. Watson can be configured using the limited number of options available
(see Figure 13.10). The procedure for customizing Dr. Watson to your own
requirements is as follows:
1 Select the View menu and click Options.
2 Click on Log Files to configure the number of log files that are able to be
stored on the computer and the folder that the log files will be saved in.
3 Click on Disassembly to configures the number of CPU instructions and stack
frames that are to be reported in the log file.
4 Click on View to configure the view that Dr. Watson is displayed in (either
Standard View or Advanced View).
Dr. Watson can be configured so that it loads automatically when Windows
starts. To do this, create a shortcut to Drwatson.exe in the Startup folder.
This configuration is useful when an issue is not easily reproducible. When
Dr. Watson traps the program fault and creates the log, you can contact technical
support for further assistance.