Game Development Reference
In-Depth Information
To check for player input, you will add code to the
Update
function. This way, the engine is checking
for input from the Player every frame. You could check for a specific key press as you did to open
the main menu, but that could become ambiguous if the player mapped the same key to any of the
functionality already assigned in the Input Manager. Instead, you will create two custom virtual
Input keys.
While it would be nice to toggle the armed state off and on with a single key, the code to prevent
immediate retriggering of the opposite state gets tedious so you will keep things simple with a two
key system.
1.
From Edit, Project Settings, select Input.
2.
Open the Axes, and set the Size to
16
.
3.
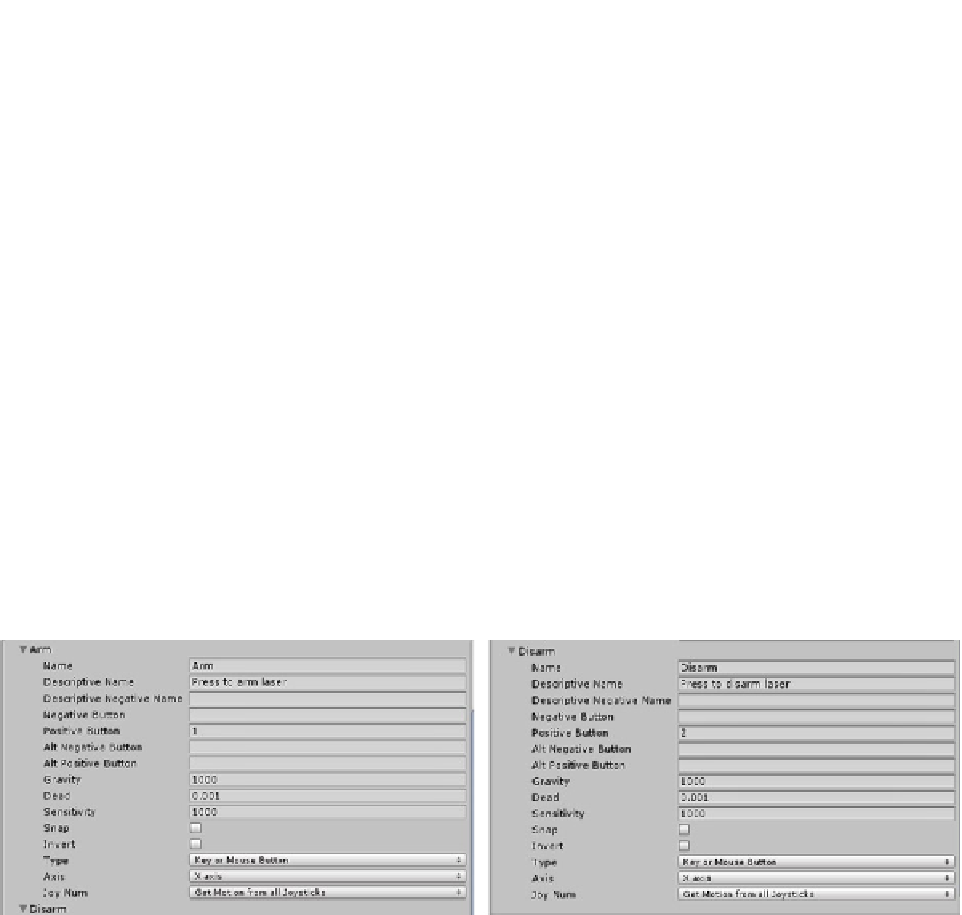
Rename the duplicate Jump to
Arm
.
4.
Set the Descriptive name to “Press to arm laser.”
This will appear in the Player Preferences dialogue that will appear at the start of the game.
5.
Set the Positive button to 1, the 1 key on the keyboard (Figure
11-22
). If you
prefer the 1 key from the keypad, use [1].
Set the Axes the Size to
17
, and repeat the process to create a
Disarm
input
that uses the 2 key (Figure
11-22
).
6.
Figure 11-22.
The new virtual inputs
Back in the LaserController script, add the following to the
Update
function:
7.
if (animator) { // check for its existance first
if(Input.GetButtonUp("Arm")) OpenHat ();
if(Input.GetButtonUp("Disarm")) CloseHat ();
} // end if animator