Game Development Reference
In-Depth Information
4.
Click Apply, and close the editor.
5.
In the Inspector, click through the new Bundle sprites until you find the beak,
or select it directly if you are using the Two Columns Layout.
6.
Drag it into the Scene view, and position it at the stork.
7.
Rename it
Lower Beak
, and assign it to the Sprite layer.
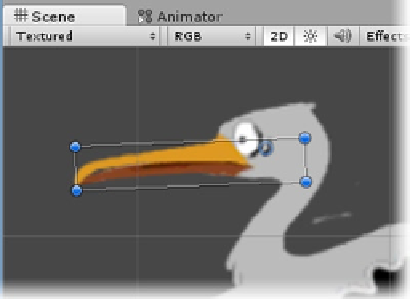
8.
Adjust its Z depth (Position) to move it behind the Stork_0 object (Figure
9-38
).
Figure 9-38.
The lower beak in position
The higher numbers are drawn first, so the beak should be a positive number higher than the
stork's 0 value.
1.
Position the cursor just off the gizmo until you can see it change to the rotate
icon.
2.
Rotate the beak to an open position to make sure the location and Pivot
location are correct for this pose (Figure
9-39
).
Figure 9-39.
The beak in its open pose