Game Development Reference
In-Depth Information
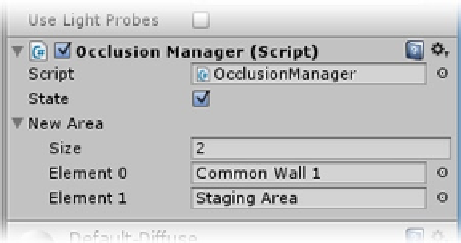
Figure 7-21.
The New Area array
The code will use the same
OnTriggerEnter
function that you used for the SensorDoors script,
including the check for the “Player” tag. Anything that can trigger the doors also must trigger the
occlusion culling.
Open the SensorDoors script, and copy the
OnTriggerEnter
function.
1.
2.
Paste it into the OcclusionManager script in the same location.
Delete the
animation
and
audio
lines, and clear the comments above the
function.
3.
Inside the function, you will iterate through the array, setting the objects to active or inactive. The
difference between the inner and outer colliders will be the state that the array elements are put into.
To iterate through an array, you have a couple of options. Arrays must have their size declared before
they can be used. By making this one public and filling it out in the Inspector, you have met this
requirement. Because their size must be declared and cannot change during runtime, arrays have a
length parameter. Knowing that, you can iterate through them with a
for
loop. To test the code, you
will have it print out the contents of the array from the
Start
function.
Inside the
Start
function, add the following:
4.
for (int i = 0; i < newArea.Length; i++) {
print (newArea [i].name); // print the name of element number i
}
Note the capital
L
on
Length
. The
for
loop iterates through an array by element number, a temporary
int type variable named
i
in this example, as long as
i
is less than the length of the array. Arrays
always start at 0, so the last element number is 1 less than the length. The counter,
i
, is incremented
by 1 (
i++
) after whatever is inside the curly brackets is evaluated. The
for
loop is especially useful
when you don't want to go through the entire array or when you require the element number for a
particular operation.
5.
Save the script, and click Play.
The contents of the New Area array are printed in the console (Figure
7-22
).