Game Development Reference
In-Depth Information
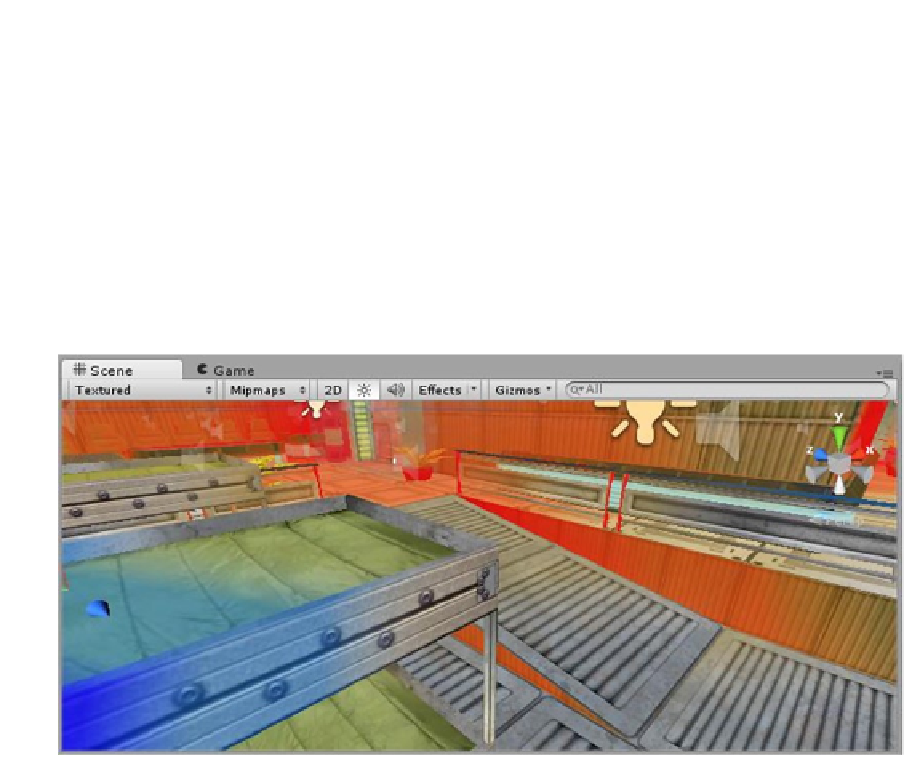
The final option shows the MIP map distance, with no color being the full original-sized texture.
As the tint goes from blue to clear to gold through to red, the smaller, blurrier maps are substituted,
preventing the sparkly artifacting effect seen as the camera pulls back away from the object. Blue
uses a blurred version of the map when the camera is close enough to see pixilation in the texture.
You will learn more about MIP mapping when you work with imported images later on.
1.
Zoom in close enough to the compound floor by using the mouse roller or by
holding the Alt key, pressing the right mouse button, and moving the mouse
to see the floor tinted blue at close range.
2.
Zoom out slowly, and watch as the tint goes to no tint then to red (Figure
1-29
).
Figure 1-29.
Color tinting indicating which version of MIP map is shown according to the distance
An absence of tint is the native image. Blue is a blurry version of it you can use so that you won't
see each and every pixel up close. Red is a blurred version of it you can use so that you won't see
the sparkly artifacting common to low-resolution videos. To see the MIP maps generated from the
imported textures, you can select a texture and view it in the Inspector.
3.
In the Project view, select the Textures folder from the Assets folder.
4.
Locate and select the AngryBots texture in the second column.
5.
At the bottom of the Inspector, in the Preview window, move the slider from
the far right, slowly over to the far left.
The images are shown in increasingly blurry versions. They appear pixilated as Unity zooms in closer
and closer and the versions are smaller and smaller.
6.
Set the Scene view drop-down menu back to its default RGB.