Game Development Reference
In-Depth Information
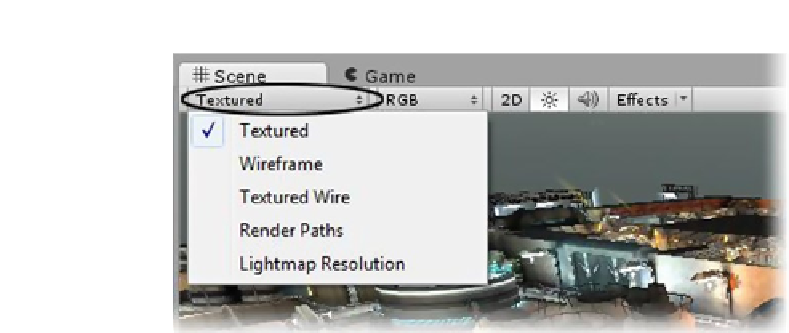
Figure 1-25.
The viewport display options
Of the five, the first three should be easy to understand, especially if you have had any background
in 3D modeling or have ever watched a “making of” video of any of the pioneers of the CG movie
industry's 3D animated films.
4.
Try selecting Wireframe and then Textured Wire.
You may have noticed that meshes automatically show as textured wire when selected. The
difference here is that the wire is black, not light blue, allowing you to continue to locate the selected
item in the Scene view. In Wireframe, you can see how 3D objects came to be called “meshes,”
as they resemble wire meshes.
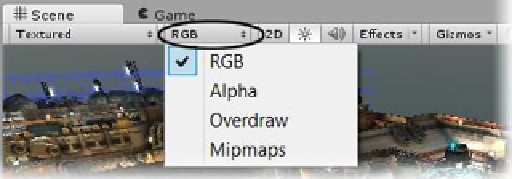
The next option to the right shows RGB (Figure
1-26
). This set of display options has to do mostly
with texture maps. RGB, the default, shows the red, green, blue part of an RGBA texture.
Figure 1-26.
The scene view options
5.
Select the Alpha option.
If you are familiar with the alpha channel of a 32-bit texture or image, you may be thinking that Alpha
is about transparency, with 0 as fully transparent and 255 as fully opaque. In Unity, however, the
alpha channel can do duty as anything from a glossiness channel to self-illumination to height maps.
Each of Unity's shaders is designed to make use of alpha channels of its textures to maximize effect
and minimize texture usage. With the Alpha option selected for the viewport texture display, you will
be able to see the alpha channel but not what it has been used for (Figure
1-27
).