Game Development Reference
In-Depth Information
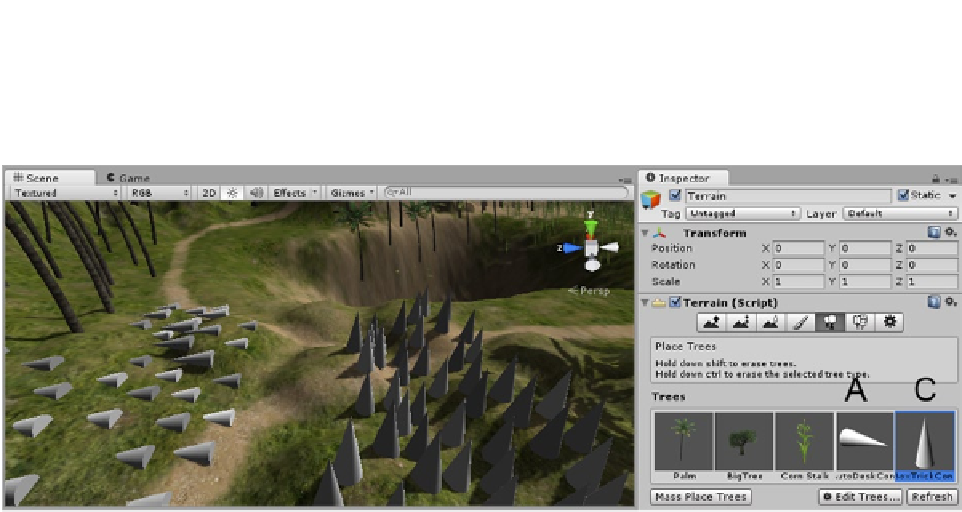
In Figure
2-62
, the first cone comes in on its side and is painted on the terrain on its side (the cones
on the left). The cone with the “corrected” transform matrix comes in as a tree with the proper up
direction and paints correctly, as can be seen on the right side of Figure
2-62
.
Figure 2-62.
The two test “trees” loaded in the terrain library and painted in the scene, A on the left and C on the right
Environment
The plants have gone a long way toward fleshing out the terrain, but there are a few more things
your scene may require.
The most obvious item is a sky. For that, you will have to import the Sky package. Unity has some
nice cube maps that are utilized by special shaders to create a sky for your environment that used
no mesh as a basis. This means your character will never be in danger of reaching its bounds. If you
are able to generate your own cube maps from another application, you can use the six generated
images to create your own cubemap inside Unity. The process is well covered in the documentation
for cubemaps.
1.
From the Assets menu or the Project view right-click menu, Import Packages,
select Skyboxes.
2.
Select the newly imported Skyboxes folder from the Standard Assets folder
in the Project view.
The skybox material thumbnails are fairly useless.
3.
Select Overcast1, and check out the six images that make its cubemap
(Figure
2-63
, left).