Database Reference
In-Depth Information
2.
Using the tabbed navigation bar across the top of the Home page, pull down
the
SQL Workshop
submenu by clicking the arrow on the right side of the
tab (see
Figure 4-1
)
.
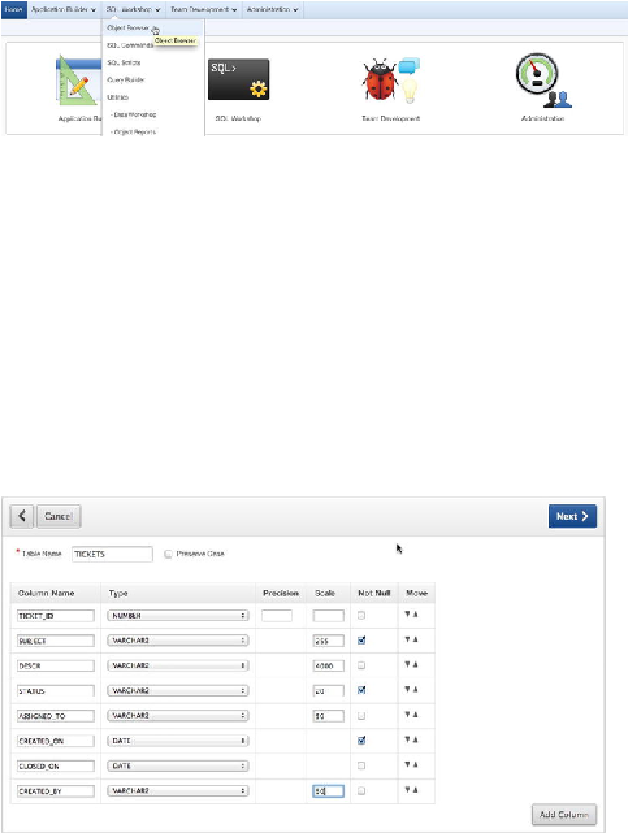
Figure 4-1.
Navigate to the Object Browser
3.
Click the
Object Browser
option.
4.
In the Object Browser, click the
Create
button in the upper-right corner and
select
Table
from the drop-down menu.
The Create Table Wizard opens. The first screen (
Figure 4-2
) allows
you to name the table and enter the details for each of the table's columns.
Using the two arrows in the Move column, you can move the columns into
whatever order you like. This affects the order in which they're defined
and stored in the table. If you run out of empty rows to enter columns into,
you can click the Add Column button to add a new empty column defini-
tion row to the form.