Database Reference
In-Depth Information
5. In the
Grid Layout
section, set
Start New Row
to
No
.
6. When the region refreshes, make sure
New Column
is set to
Yes
.
7. At the top of the page, use the
>
button to navigate to the next field
in the list (P210_CREATED_BY).
8. In the
Grid Layout
section, set
Start New Row
to
No
.
9. When the region refreshes, make sure
New Column
is set to
Yes
.
10. Click
Apply Changes
.
Implementing LOVs
Next, you'll tie the lists of values (LOVs) that you created in
Chapter 4
to the
P210_ASSIGNED_TO and P210_CREATED_BY items on the form. You tie in the
LOVs prior to fine-tuning the layout, so the layout is based on the select-list items:
1. Edit
Page 210
of the application.
2. Edit the item
P210_ASSIGNED_TO
by double-clicking its name.
3. In the
Identification
section, set
Display As
to
Select List
.
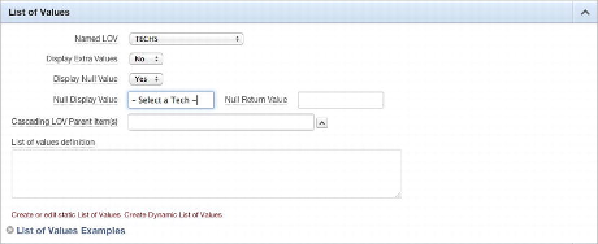
4. In the
List of Values
section (see
Figure 6-60
)
, set
Named LOV
to
TECHS
, set
Display Extra Values
to
No
, set
Display Null Value
to
Yes
, enter
- Select a Tech -
for
Null Display Value
, and click
Apply Changes
.
Figure 6-60.
Setting LOV attributes

