Graphics Programs Reference
In-Depth Information
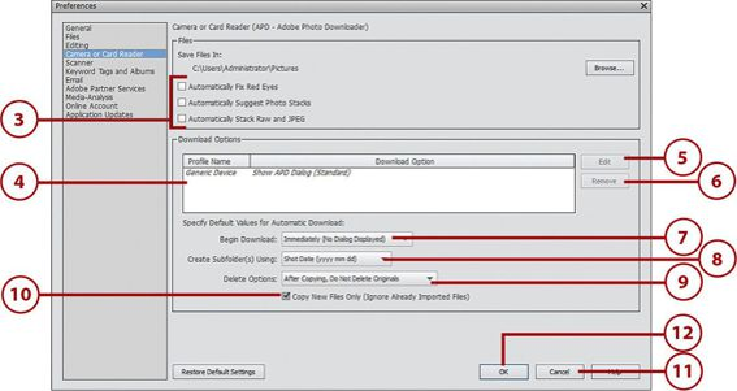
2.
Under Files, click Browse to change where files are copied to on your disk drive.
When you import from camera or card reader, files are copied to the folder desig-
nated in this preference setting. The default location is the Pictures folder.
3.
Click to select the options you want in the Files area. These File Options are toggle
options; click once to select and click a second time to deselect.
•
Automatically Fix Red Eyes
—Select this setting to apply the red eye fix to all
photos being imported. The setting is turned off by default.
•
Automatically Suggest Photo Stacks
—Select this setting to let Organizer sug-
gest ways to organize the imported photos in photo stacks based on visual sim-
ilarities and the date the photo was shot. The setting is turned off by default.
•
Automatically Stack Raw and JPEG
—Select this setting to let Organizer
automatically create photo stacks from Raw and JPEG files. The setting is
turned off by default.
4.
In the Download Options area, click a device.
5.
Click Edit to edit the device.
6.
Click Remove to disconnect the device from your computer.
7.
Click the Begin Download menu to choose how to start your download.
8.
Click the Create Subfolder(s) Using menu and choose how to create the naming
convention for your folders. This is set to the Shot Date format by default.
9.
Click Delete Options and choose how to delete your media during import.