Graphics Programs Reference
In-Depth Information
9.
Click the Brush tool from the toolbox.
10.
Set your Brush settings. (This topic is covered in
Chapter 10
.
)
11.
Click and drag to paint your mask area.
12.
Repeat steps 5-11 to continue to develop your mask.
>>>Go Further:
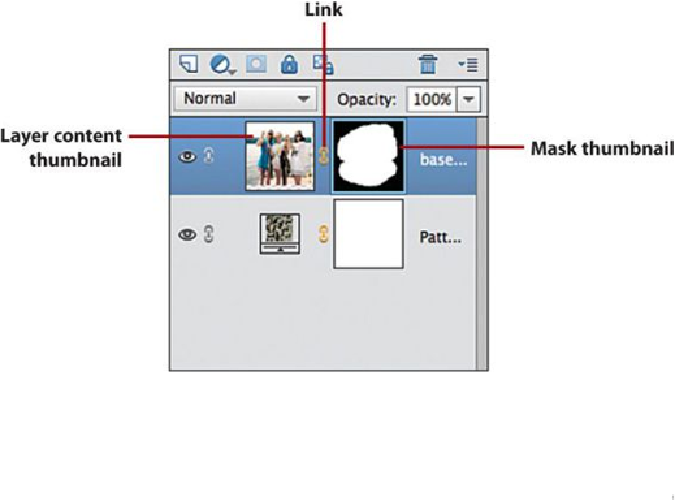
Modifying a Layer Mask
After you have a layer mask created, you can adjust its scale, position,
orientation, and add other bitmap images or shapes to it. A layer mask
is made up of two thumbnails that represent the image on the layer and
the masking area. By default, these two thumbnails are linked. You can
work between the two thumbnails to adjust and modify your mask.
Click the Mask thumbnail and modify the mask using the Brush and/or
Eraser tools. Use the Color Picker to establish the mask area—black,
white, and gray. If you click the link between them, this unlinks the two
thumbnails, and any edits you make apply to just that thumbnail's con-
tent, the mask or the image. Click the link again to link the layer image
with the mask.
You can also use the Selection tools to transform, scale, and reposition
the mask or the layer content in the layer. The Selection tools are