Graphics Programs Reference
In-Depth Information
This chapter covers how to edit a photo in the Quick mode of the Photo Editor. Many of the
tools, functions, and features are similar to the Instant Fix tools of the Organizer, but the
Photo Editor has even more tools, functions and features for editing and enhancing your
photos. This chapter looks at how to use the Quick mode and its tools that can quickly fix
blemishes or problems in a photo. Also covered is how to apply Adjustments to fix com-
mon problems that occur in photography and to enhance the photo image.
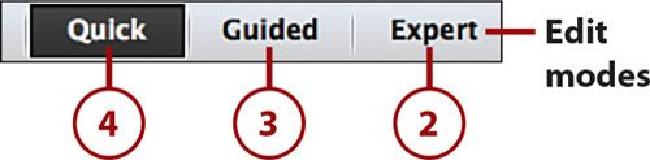
Editing Modes of the Photo Editor
The Photo Editor of Photoshop Elements 13 is very powerful and offers many options for
getting just the right look for all your photos. It allows you to edit the entire photo, or just
a selection in the photo, and quickly apply enhancements, modifications, and edits. There
are three modes: Quick, Guided, and Expert. Each mode offers tools, features, and func-
tions for editing and enhancing your photos. This chapter covers the Quick mode and how
to apply quick fixes.
1.
Open the Photo Editor. (See
Chapter 1
,
“
Getting Comfortable with the Photoshop
Elements 13 Workspace, Preferences, and Settings
,
” to learn how to open the
Photo Editor.)
2.
To access the Expert mode, click the Expert mode.
3.
To access the Guided mode, click the Guided mode.
4.
To access the Quick mode, click the Quick mode.
Which Mode Should I Use?
If you are new to Photoshop Elements and the Photo Editor, the Quick or
Guided modes are a good place to start for your photo edits and enhance-
ments.
Opening a Photo in Photo Editor
1.
Open the Photo Editor.