Graphics Programs Reference
In-Depth Information
5.
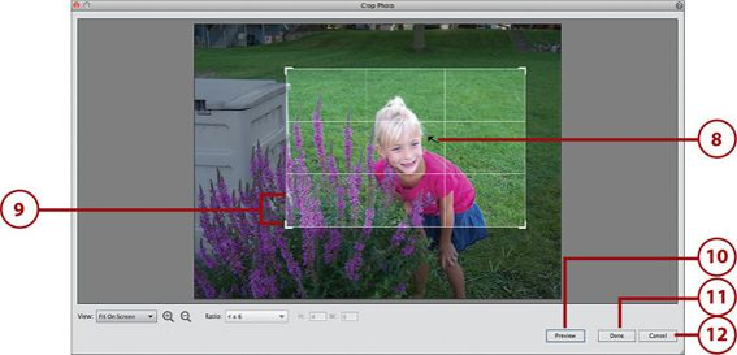
The Crop Photo window displays with crop marks. Click the View menu and zoom
in or out of the image.
6.
You can also use the Zoom In/Zoom Out tools to adjust the zoom on the photo.
Click either tool and then click in the photo to zoom in or out based on which tool
you selected.
7.
To constrain the crop marks to a set ratio, such as 4×6, click the Ratio menu to se-
lect a ratio menu option.
8.
Click in the crop area and drag to position it to focus on the image in the photo.
Grid lines display to help you position the crop area where you need for your
photo.
9.
Click anywhere on the border of the crop area and drag to adjust the size of the
cropping area. If you click a corner border, you can adjust both the width and the
height of the crop area.
10.
Click Preview to see a preview of your crop.
11.
Click Done to crop the photo and close the Crop Photo window. You can also
double-click in the crop area to apply the crop.
12.
Click Cancel if you need to cancel out of the crop.

