Graphics Programs Reference
In-Depth Information
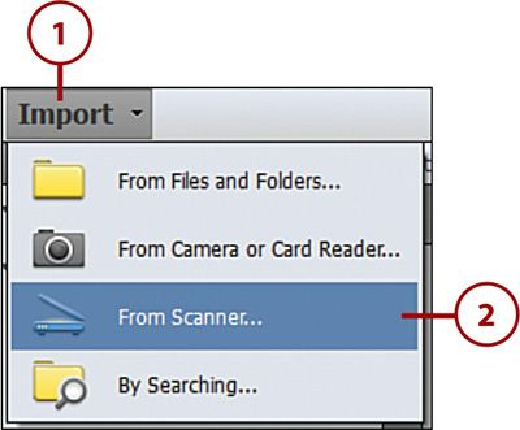
3.
In the Get Photos from Scanner window, click the Scanner menu and choose a
scanner.
4.
Click the Browse button to choose a different folder to save the new scanned pho-
tos. By default, this is set to the Pictures\Adobe\Scanned Photos folder.
5.
Click the Save As menu and choose a file type.
6.
Click and drag the slider to set the Quality.
7.
Click OK to begin scanning the photo directly from Organizer for Windows.