Game Development Reference
In-Depth Information
Importing this package is performed exactly as you did with the Zombie Character Pack. In the Unity
editor top menu, select Window ➤ Asset Store to open a separate window to the Unity Asset Store.
In the search bar, type
Mecanim Locomotion Starter Kit
and click the blue Download button. The
Importing Package window will open with all of the package contents checked for import. Leave all
of these checked and click Import in the bottom right corner of the window, and the Locomotion
Setup folder containing the Mecanim Locomotion Starter Kit will appear in the Project panel.
In the Project panel, select the Animators folder. Create a new Animator Controller named
ZombieLocomotionController, then double-click to open it.
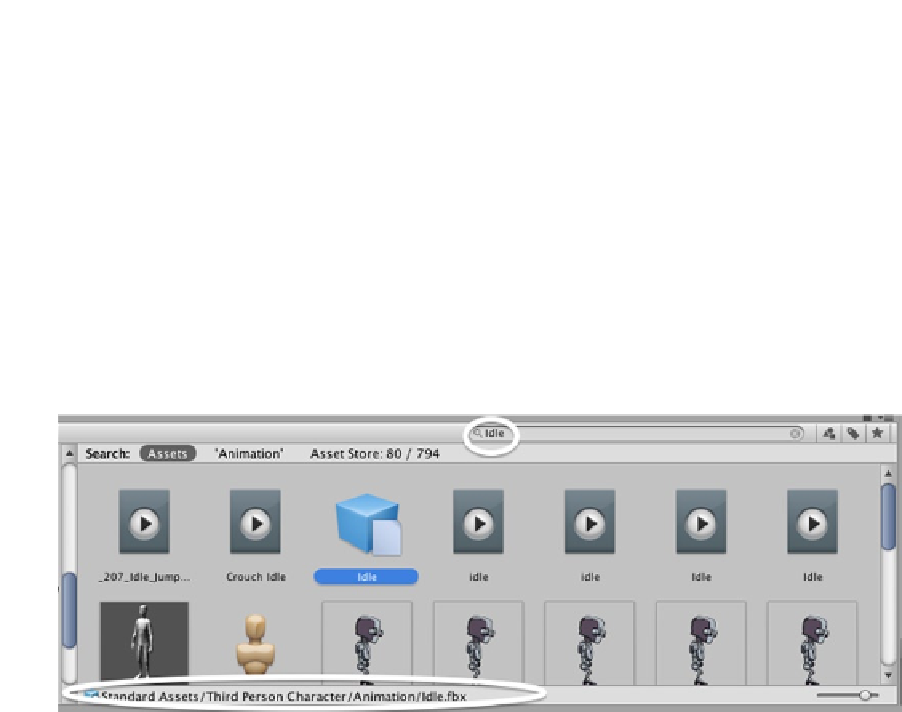
To find the Idle animation clip, in the Project panel search bar enter
Idle
. Select the
DefaultAvatar@Idle_Neutral icon and confirm that it is the
Setup/Locomotion/Animations/
DefaultAvatar@Idle_Neutral.fbx
by looking at the breadcrumb trail that appears at the bottom
(Figure
5-36
).
Figure 5-36.
DefaultAvatar@Idle_Neutral
icon selected in the Project panel
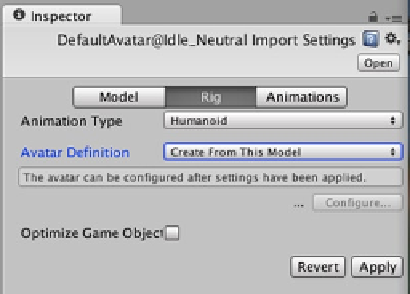
First, configure the animations: With the Idle icon still selected in the Project panel, in the Inspector
select Rig. Animation Type should be Humanoid, then change Avatar Definition to Create From This
Model and click Apply (Figure
5-37
). A checkmark should appear next to the Configure… button.
The Animation settings can be left as is. Now the animation clip is compatible with the zombie model
animation avatar you created earlier in this chapter.
Figure 5-37.
Animation.fbx
Rig settings in the Inspector