Graphics Programs Reference
In-Depth Information
Let's continue around the ear beginning with the earlobe.
Grab the edge loop that is at the end of the helix near the
earlobe. Shift-drag this to create the earlobe. Continue on up
from there to start forming the connection between the
earlobe and the tragus.
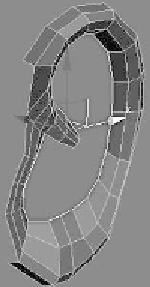
Figure 18-7:
Added polygons
to represent the
earlobe
At this point it may look a little strange. Don't worry, though!
We're not far off from it resembling an ear. From here we need
to connect the new polygons coming up from the earlobe to
the tragus area. To do this, we can use Target Weld. Just grab
the polygons coming up from the lobe and weld them to the
closest vertices. I also added another polygon strip where the
helix fades into the ear. This is selected in Figure 18-8.
Figure 18-8:
Attached
polygons