Graphics Programs Reference
In-Depth Information
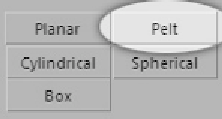
Now press the Pelt button located in the Map Parameters
rollout.
Figure 17-32:
The Pelt button
Just as before when we used the Map Parameters options, we
now have to select an axis to perform our pelt unwrap on.
Most of the time, Best Align will work the best so choose that
option here.
Now that the axis is selected, all that is left to do is per-
form the Pelt action. Select Edit Pelt Map located at the
bottom of your Map Parameters rollout.
Figure 17-33:
The Edit Pelt
Map button
only appears
after you've
clicked the Pelt
button.
This opens the Pelt Map Parameters dialog and a modified
UVW editing window.
I'll just explain briefly what is going on here. Here you
have your unwrap. The circle with the lines is your
“stretcher.” The stretcher pulls and stretches your UVs flat
like a piece of animal hide, similar to how Native Americans
stretched hides. To the right is the Pelt Map Parameters dia-
log box. The only two buttons we will use for this map are the
Simulate Pelt Pulling and the Relax (Light) buttons. So even
though it looks like a lot, we're really only doing a couple of
things.