Graphics Programs Reference
In-Depth Information
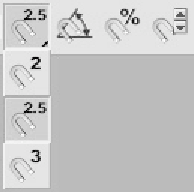
To activate your 2.5-dimensional snapping, click and hold
on the Snaps Toggle button to display a drop-down containing
a few options.
Figure 8-11:
Snap types
Select the button that says 2.5. You have now activated 2.5-D
snapping. All 2.5 does is allow you to snap on the ground
plane. It basically lets you use the full strength of your snaps
without including the z-axis.
Maximize the Top view and begin tracing the interior
walls. After tracing all of the outer edges of the walls you want
to have trim, you'll have to attach all of the splines together.
Pick any one of your splines and click Attach Multi. This will
bring up a name selection box. Pick all of the splines you've
created. Now we have one spline object. Next, pick the Vertex
sub-object button and select all the vertices that make up your
trim splines. Click the Weld button contained in the Geometry
section of your Line object. Since you used snaps, all of your
spline vertices should be on top of one another and close
enough to be auto-welded. When you're done, you'll end up
with something like Figure 8-12.