Graphics Programs Reference
In-Depth Information
Creating Bump Effects and Navigating Your
Materials
Let's create a very basic material that has a nice bump map in
the Bump channel. Create a shiny red material using the Blinn
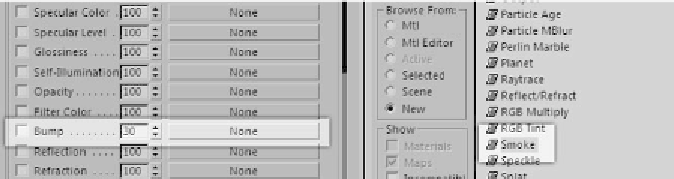
Basic Parameters rollout. Then let's add our bump map. Select
the empty Bump channel by clicking the None button next to
it. A long list of different map effects you can apply to your
material will appear. For now, we will look at the Smoke map.
Figure 4-7: Left, “None” button; right, list of map types
You'll notice that the bump map makes your material appear
as if it has a very rough surface. Pretty neat, huh?
You'll also notice that anytime you enter a map into an
empty slot, it takes you into a totally new section of the
Material Editor.
All channels have their own individual editors. They are
very easy to navigate and can really help you get those final
little tweaks you want. Skip over the Coordinates options for
now and look at the smoke options. Here we can control size,
phase, iteration (or quality), and exponent (or range), and set
the two colors between which the smoke is generated. You
can even add more layers of effects by replacing one of your
colors with another map by clicking on one of the None slots
just as we did to get to these options in the Smoke map. Play
around with these settings all you like!