Graphics Programs Reference
In-Depth Information
In the early days of the Web, slicing was used to create the appearance that a page was
loading faster; a user could see the dif erent slices loading instead of waiting for the entire
image to appear. These days, slices can still be used in this way for web graphics, but it is
more likely that you would use slices to precisely choose the area of an image you would
like to export. You might then use the slice for a CSS background image or some other
element of your web page (such as a button). In this exercise, you will create guides that
will determine where the slicing of your image occurs.
1
If rulers are not displayed, choose View > Rulers to show the rulers on the top and
left side of the document window.
2
Choose View > Snap to turn of the snapping features for the rest of this lesson. The
snapping features sometimes force the cursor to align with elements in your images,
such as the edges of the text layers.
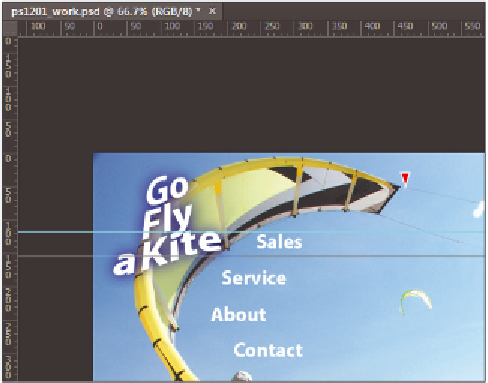
Using the rulers, you will create guides on your document that will later dei ne where
you want to slice your image.
3
Click directly on the top (horizontal) ruler, and then click and drag to pull a guide
from the ruler. Continue dragging the guide; release it when the guide is just above
the Sales text layer.
4
Now, click and drag another guide from the top ruler and release it when it is between
the word
Sales
and the word
Service
in the image area.
Click and drag horizontal guides to separate the text.
5
Click and drag another guide from the top ruler and release it between the
Service
and
About
text on the image, and another between the
About
and
Contact
text.