Graphics Programs Reference
In-Depth Information
3
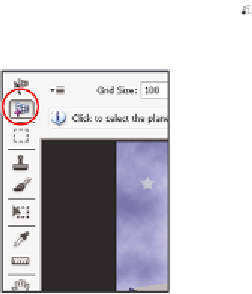
Select the Create Plane tool (
+
). You'll now create a new plane by dei ning each
corner of the plane.
The Create Plane tool.
4
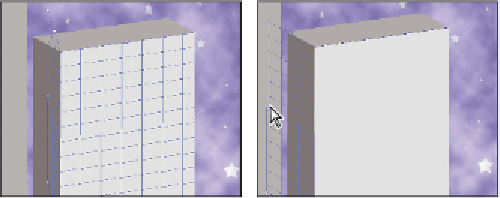
Click on the top left of the front of the box, then on the top right, then on the bottom
right, and once more on the bottom left. Notice that a blue grid indicates a valid
plane. If your plane is red or yellow, it is invalid; use your Edit Plane tool to readjust
your corners until the grid is blue.
When drawing a plane, you can temporarily hold down the
X
key on your keyboard to magnify
an area for more precise drawing of the plane.
For a plane to be valid, two sides of the plane should be parallel, while the other two
sides show the perspective.
Building an attached plane
You can control the angle of a plane, and you are not restricted to 90 degree angles.
1
Make sure that the Create Plane Tool is selected. Press and hold down the Ctrl
(Windows) or Command (Mac OS) key, and drag the left-middle edge node toward
the back edge of the box. This creates a perpendicular plane that will be used for the
left side of the box. Don't worry if it is not aligning at the exact angle. You will i x
that in the next step.
Ctrl/Command+click.
Drag out a new perpendicular plane.