Graphics Programs Reference
In-Depth Information
11
In the Properties panel, click and drag the Saturation slider to
-
60, or type
-60
in the
Saturation text i eld. This tones down the bright blue. Click the Properties tab to close
this panel.
12
Choose File > Save, and then File > Close to close the i le. As before, the butterl y in
your work image has been automatically updated.
Using this combination of adjustment layers and Smart Objects gives you tremendous
l exibility with your layers. Adjustment layers and Smart Objects encourage you to
experiment without fear of destroying the integrity of the original image. As you will
see in the next exercise, this ability to edit the contents of a Smart Object has even
more power when you have multiple Smart Objects.
Modifying multiple Smart Object layers
Another benei t of Smart Object layers is that multiple layers can be modii ed at the same
time.
1
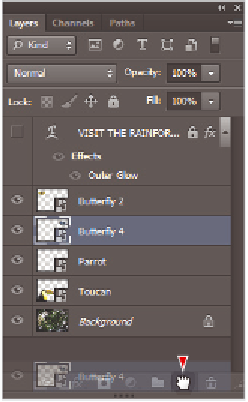
In the main composition, ps1001_work.psd, click and drag the Butterl y 4 layer down
and hover over the Create a New Layer button ( ) in the Layers panel to duplicate
it. Select the Move tool ( ), then click and drag the copy to the far left, next to the
yellow butterl y.
Duplicate the Butterl y 4 layer.
You can also duplicate layers by choosing Layer > Smart Objects > New Smart Objects Via Copy.
2
In the Layers panel, double-click the layer name, Butterl y 4 Copy. When the layer
name becomes highlighted, type
Butterl y 5
to rename the layer.