Graphics Programs Reference
In-Depth Information
4
You will now save the i le. Choose File > Save As and navigate to the ps08lessons
folder. In the Name text i eld, type
mylayers
. Choose Photoshop from the Format
drop-down menu and press Save. If the Photoshop Format Options dialog box
appears, press OK.
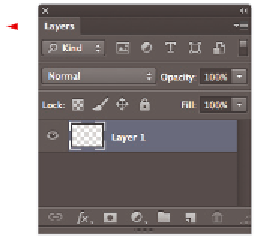
To help you work with layers, Photoshop provides a panel specii c to layers. In
addition to showing thumbnail previews of layer content, the Layers panel allows
you to select specii c layers, turn their visibility on and of , apply special ef ects, and
change the order in which they are stacked.
5
If the Layers panel is not visible, choose Window > Layers. Click on the Layers tab
and drag it out of the docking area for this lesson so that you can more closely follow
the changes you are making.
6
If the Swatches panel is not visible, choose Window > Swatches. Click and drag on the
Swatches tab to take it out of the docking area.
Click on the panel tabs and drag the Swatches and
Layers panels out of the docking area.
7
Select the Rectangular Marquee tool ( ) and click and drag; to constrain the marquee
selection to a square, hold down the Shift key as you drag. Release the mouse when
you have created a large, square marquee. Exact size is not important for this step.
8
Click on any red color in the Swatches panel. In this example, CMYK Red is used.
9
Choose Edit > Fill, or use the keyboard shortcut Shift+Backspace (Windows) or
Shift+Delete (Mac OS), to open the Fill dialog box.