Graphics Programs Reference
In-Depth Information
You'll have an opportunity to use several of these tools in the next lesson. Before starting,
have a look at the panels on the right, and learn a bit about how they are used.
A
B
C
D
E F G H I J K L M N
A.
Shadow Clipping Warning button.
B.
Histogram.
C.
Highlight Clipping Warning button.
D.
Info.
E.
Basic panel.
F.
Tone Curve panel.
G.
Detail.
H.
HSL/Grayscale.
I.
Split Toning.
J.
Lens Corrections.
K.
Ef ects.
L.
Camera Calibration.
M.
Presets.
N.
Snapshots.
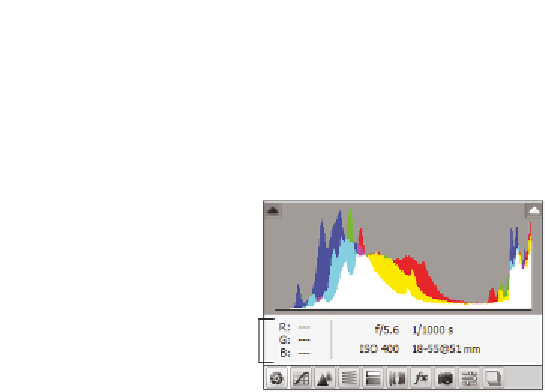
A. Shadow Clipping Warning button
: Indicates if an image is underexposed, with
large areas of shadow being clipped. Clipped shadows appear as a solid dark area if not
corrected using the exposure controls.
B. Histogram
: Shows you where image data resides on the tone curve.
C. Highlight Clipping Warning button
: Indicates if an image is overexposed, with
large areas of highlight being clipped. A clipped highlight appears as a solid white area if
not corrected using the exposure controls.
D. Info
: Displays the RGB readings that enable you to check your colors and balance.
E. Basic panel
: Contains the main controls, such as White Balance, Exposure, and Fill
Light, among others.
F. Tone Curve panel
: Adjusts the tone curve. The Point tab must be brought to the
front (by clicking on it) to activate point-by-point controls.
G. Detail
: Adjusts Sharpening and Noise Reduction.
H. HSL/Grayscale
: Allows you to create grayscale images with total control over
individual colors and brightness.
I. Split Toning
: Introduces additional color tones into image highlights and shadows.
J. Lens Correction
: Corrects for lens problems, including fringing and vignetting.
K. Ef ects
: Applies i lters and of ers the ability to create post-cropping vignetting.
L. Camera Calibration
: With the Camera Calibration tab, you can shoot a Macbeth
color reference chart (available from camera suppliers). Then you can set Color Samplers
on the reference chart, and use the sliders to balance the RGB values shown in the Info
section. Settings can be saved by selecting the Presets tab and clicking on the New Preset
button in the lower-right corner, or by choosing Save Settings from the panel menu.
M. Presets
: Stores settings for future use in the Presets tab.
N. Snapshots
: Of ers ability to save multiple versions of an image.