Graphics Programs Reference
In-Depth Information
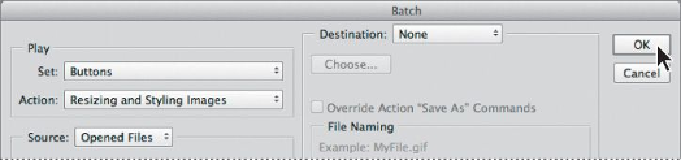
• Confirm that Buttons is chosen in the Set menu and Resizing and Styl-
ing Images—the action you just created—is chosen in the Action menu.
• Choose Opened Files from the Source menu.
• Make sure None is chosen for the Destination.
• Click OK.
Photoshop plays the action, applying its steps to all the files that are open. You can
also apply an action to an entire folder of images without opening them.
Because you saved the file and closed it while you were recording the action, Pho-
toshop saves each of the images as a PSD file in its original folder, and then closes
the file.
Placing Files in Photoshop
The four additional button images are ready to be placed into the design. You prob-
ably noticed that each already has a blue band with its gallery name included in
the image, so you don't need to perform those steps. They're ready to go.
1.
Choose File > Open, navigate to the Lesson13 folder, and double-click the
13Working.psd file to open it in Photoshop.
2.
in the Layers panel, select a layer group name or the logo layer. New lay-
ers are added above the selected layer; don't add them to the Gallery 4
layer group.
3.
Choose File > Place Embedded.
You'll place these files as embedded Smart Objects. Because they're embedded,
the entire image is included in the Photoshop file.
4.
In the Place Embedded dialog box, navigate to the Lesson13/Buttons
folder, and double-click the Gallery5.psd file.
Photoshop places the Gallery5.psd file in the center of the 13Working.psd file. But
that's not where you want it to go. You'll move it.